Where to Start with Claude Code
I've sent the same Slack message more than 20 times. Here's that message, with the context that makes it useful.
TL;DR
| What | Details |
|---|---|
| The pattern | Same question every week: “where do I start with Claude Code?” |
| The mistake | Starting with plugins and MCP servers. |
| The right order | Vocabulary first, then orientation, then config, then extensions. |
| Shortcut | One command generates a personalized path in 3 minutes. |
| All resources | cc.bruniaux.com, organized by stage below. |
Last week, someone sent me a message on Slack:
“Hi Florian. I’m trying to get Claude Code up and running to improve my productivity. I started a week ago, but I’ve been using other agentic AI tools at work for months. I have a solid backend/QA background. After seeing your message I’ll admit I’m a bit lost with all the features, plugins, etc. Where would you suggest I start?”
I recognized the profile immediately, because I’ve seen it more than 20 times. Experienced developer, months of agentic AI behind them, but Claude Code feels different from everything they’ve used before. They’re staring at a sea of features without a map.
I sent him the same response I’ve sent every time: a block of links with brief descriptions, enough to orient but not enough to explain why the order matters.
This article is that response, with the context I always skip in Slack.
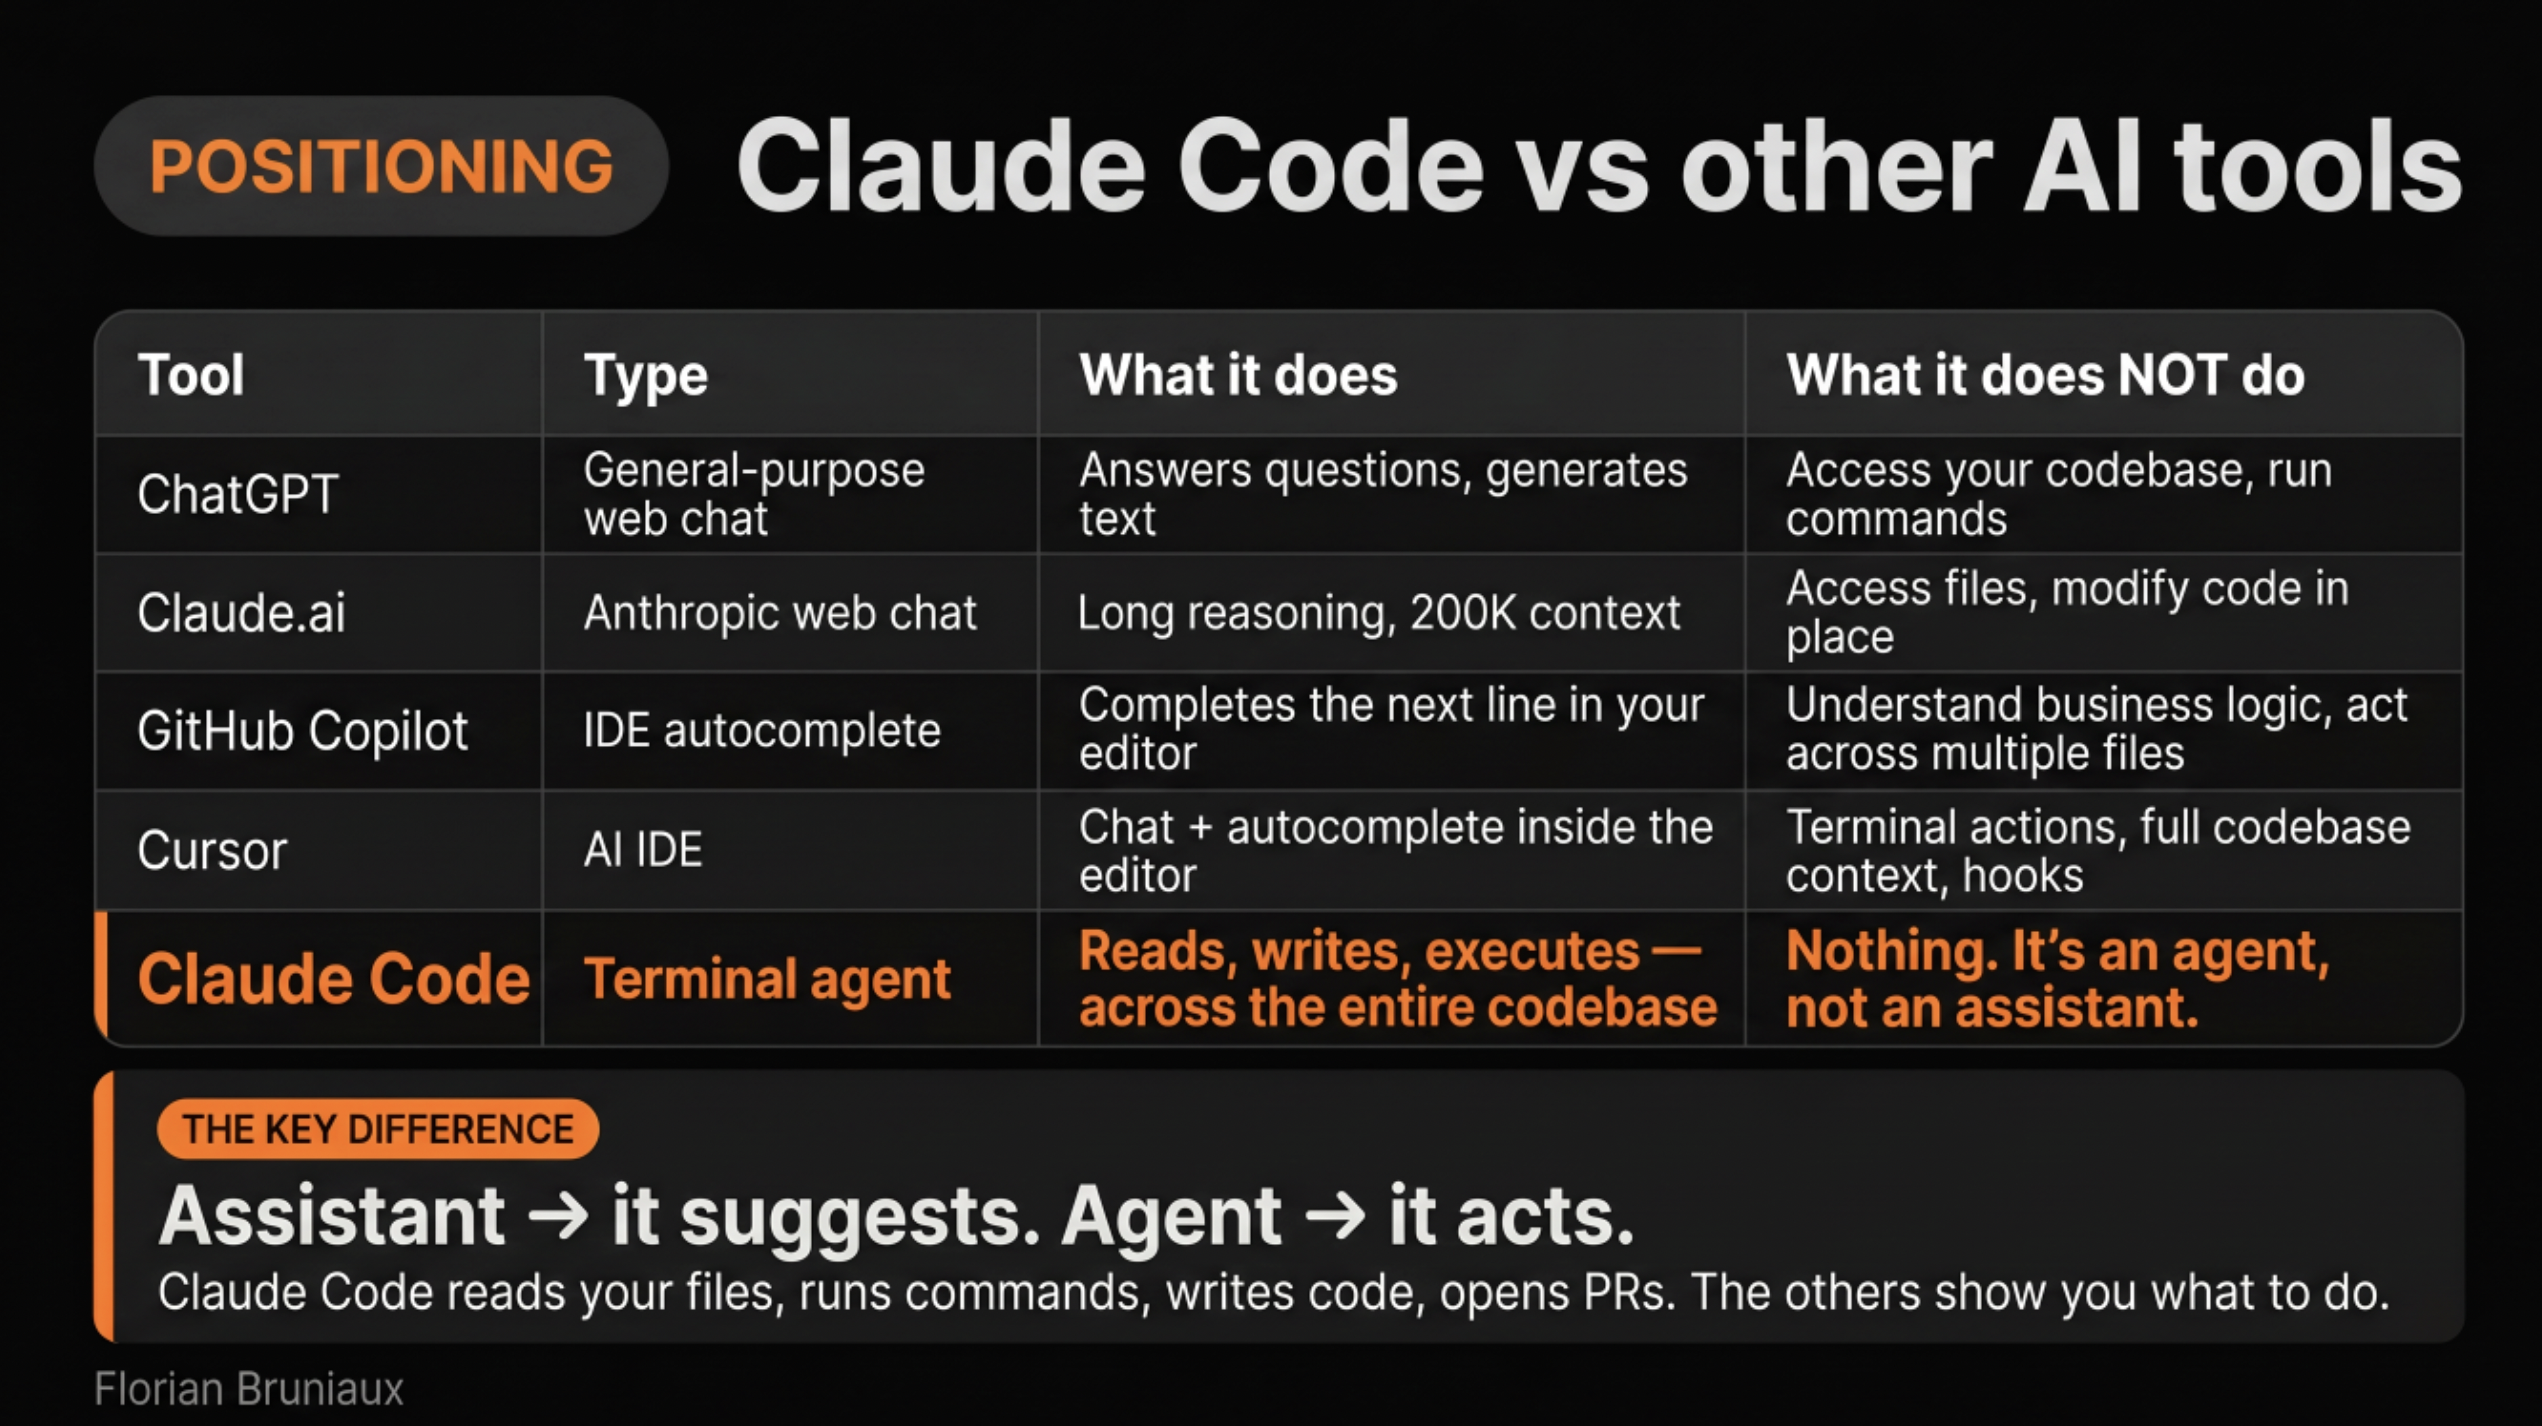
Why Claude Code feels different
Most AI tools slot into an existing workflow. You open a chat window, you describe a problem, you get an answer. Claude Code is closer to a development environment with its own configuration layer: CLAUDE.md files, hooks, skills, MCP servers, slash commands, context management. The surface area is much larger, and the interaction model assumes you’ve made deliberate choices about how you want it to behave.
That gap is why experienced engineers still get lost. The tool isn’t hard. The implicit prerequisite nobody mentions is that you need to understand what configuration is possible before you can configure anything usefully.
Under all the configuration surface, the architecture is simpler than it looks: eight core tools handle roughly 95% of every session, running on search rather than an index. There’s no background model of your codebase, no cached embeddings. Claude reads your files the way a developer would, which is why what you put in the config layer carries so much weight.
The sequence I’ve settled on after watching a lot of people onboard: vocabulary, then orientation, then your first config, then extensions. Skipping steps one or two is how you end up with an impressive-looking setup that doesn’t change how you work.
Start with the vocabulary
I spent my first serious week with Claude Code editing a configuration file I’d found on GitHub. It looked right, it came from someone whose setup I respected, and I spent an evening adapting it. Two days later I realized I’d been editing the wrong sections, for the wrong reasons, without understanding what half the fields meant. The configuration was longer and no more useful.
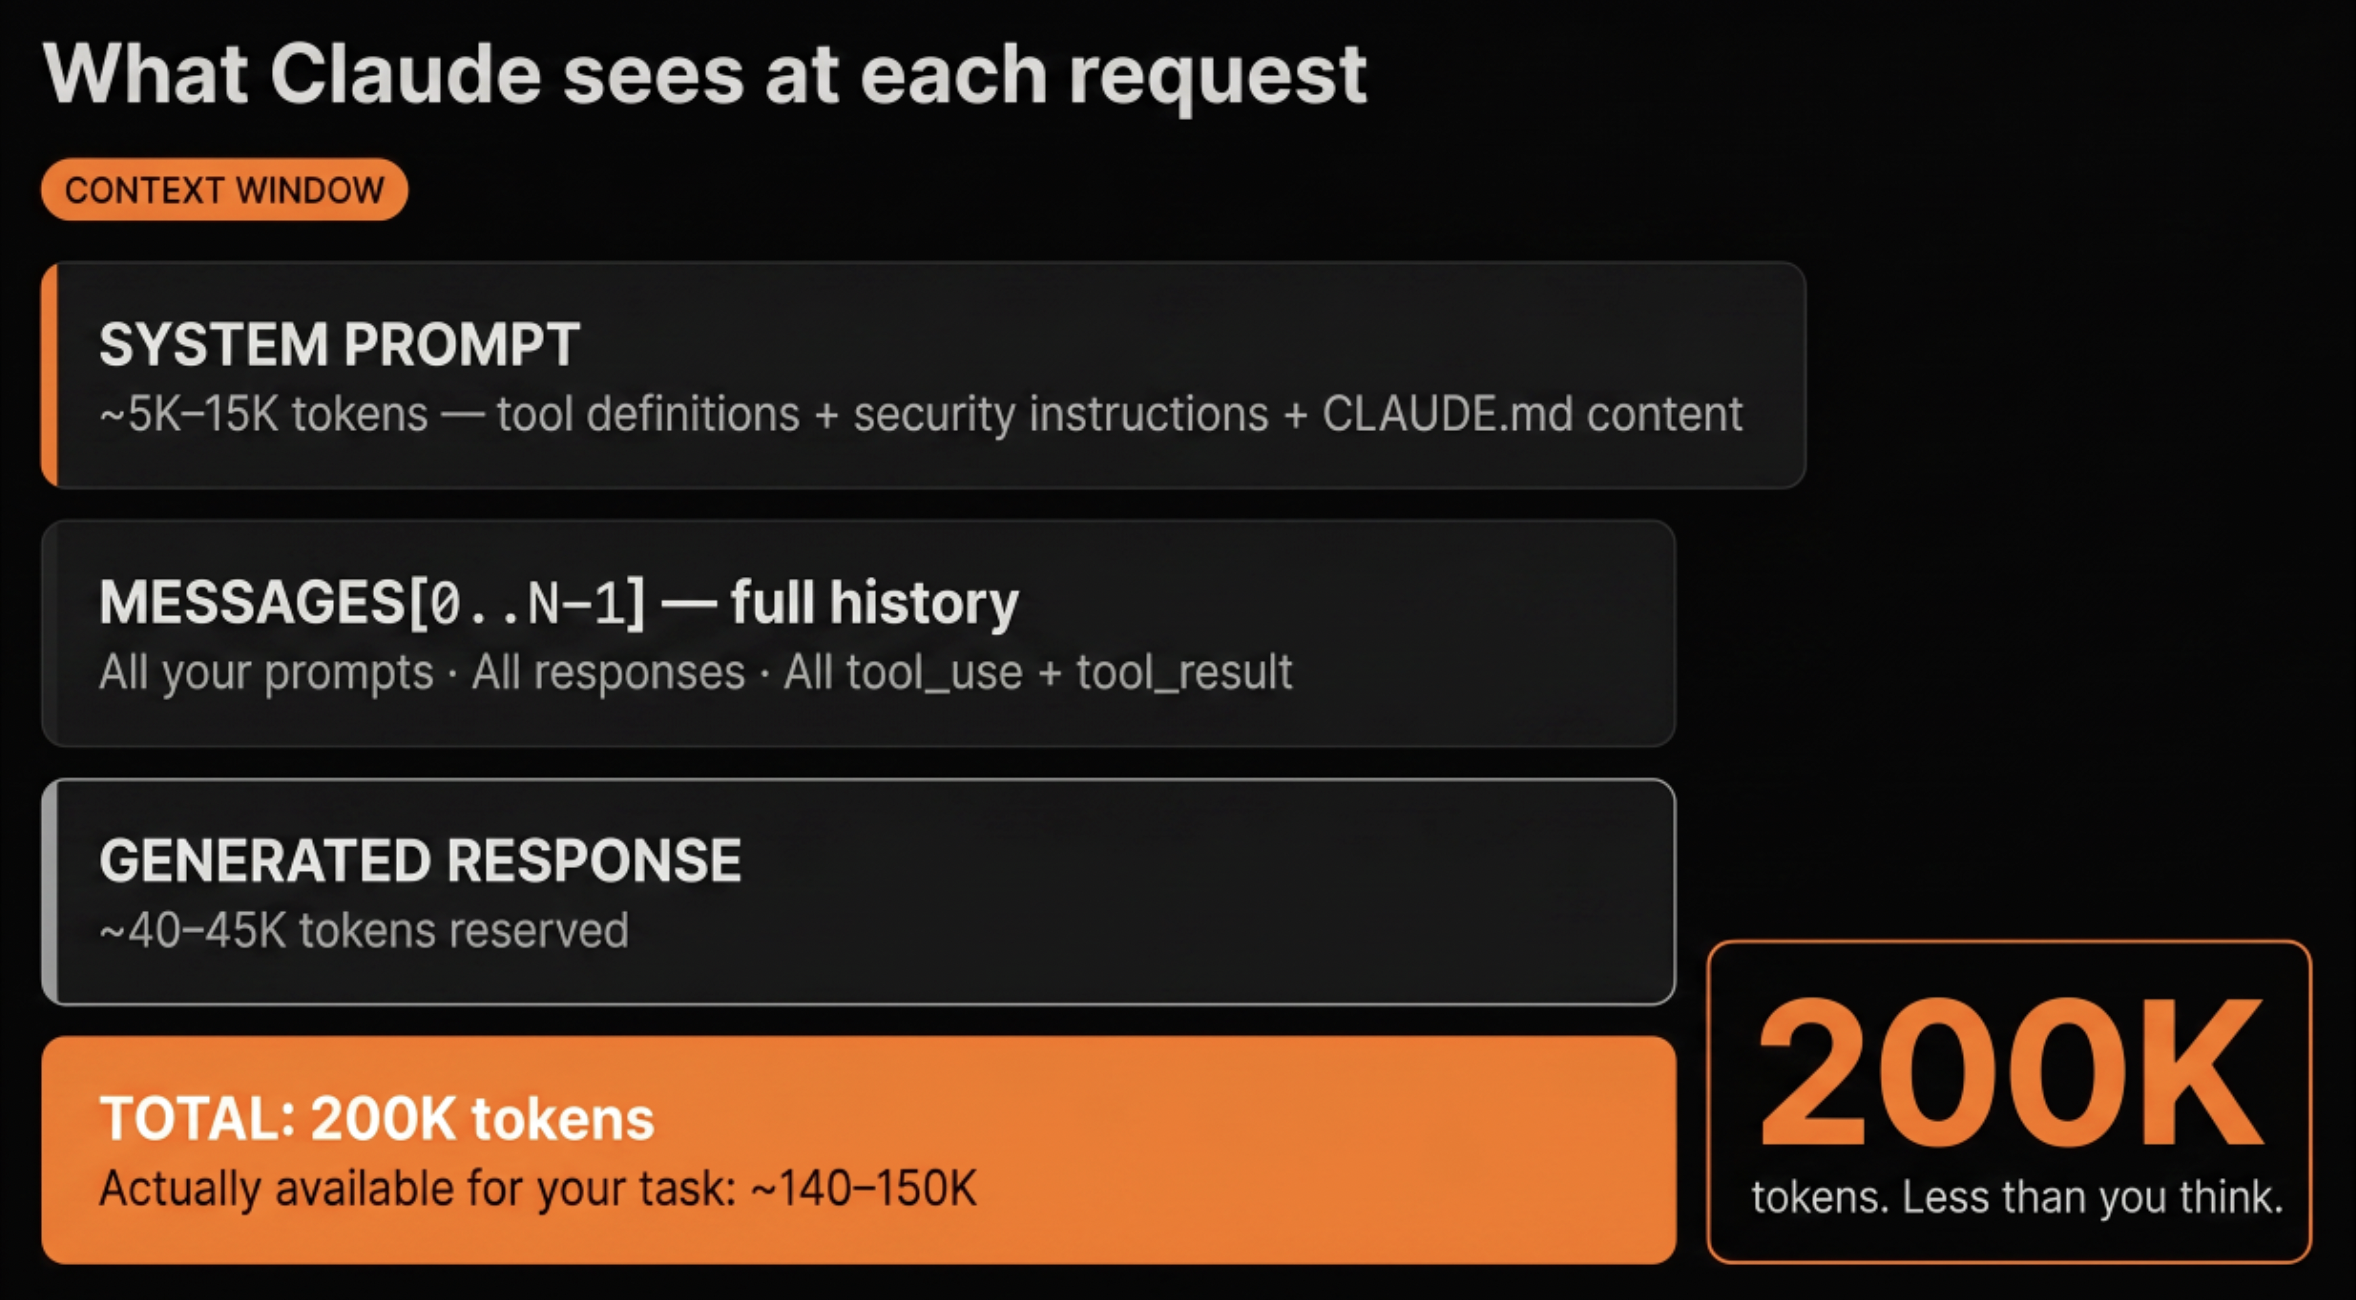
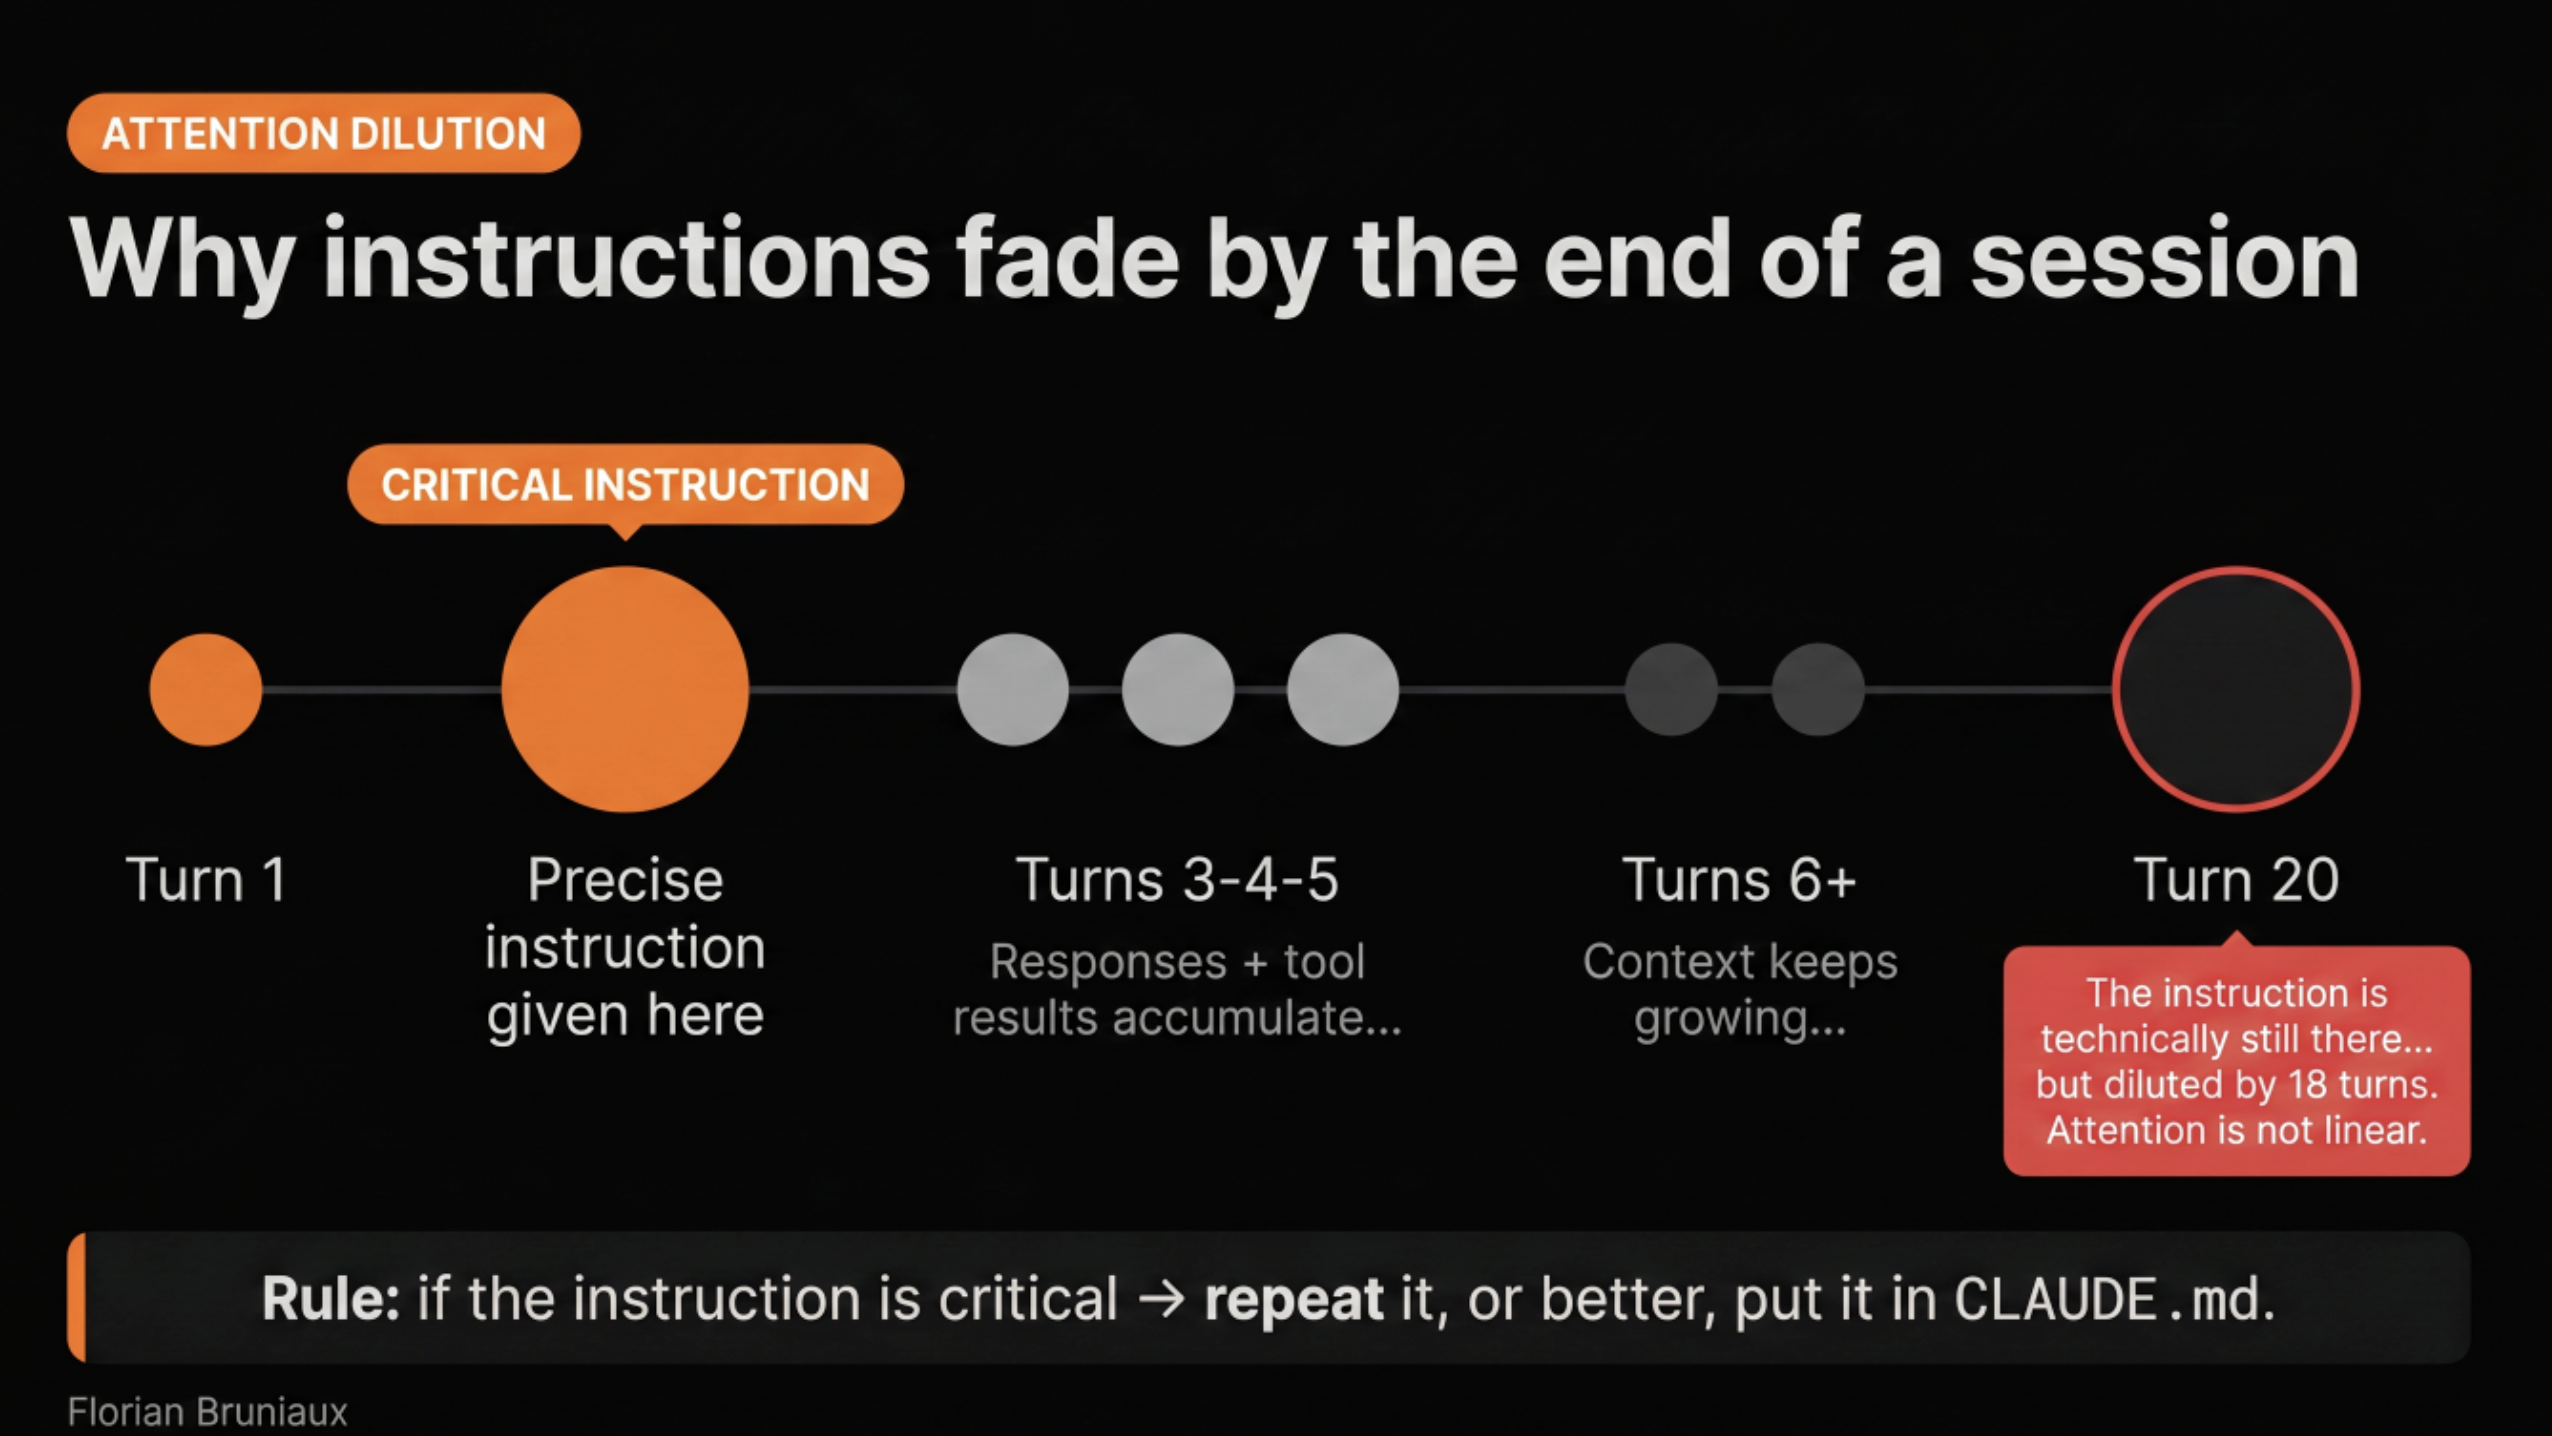
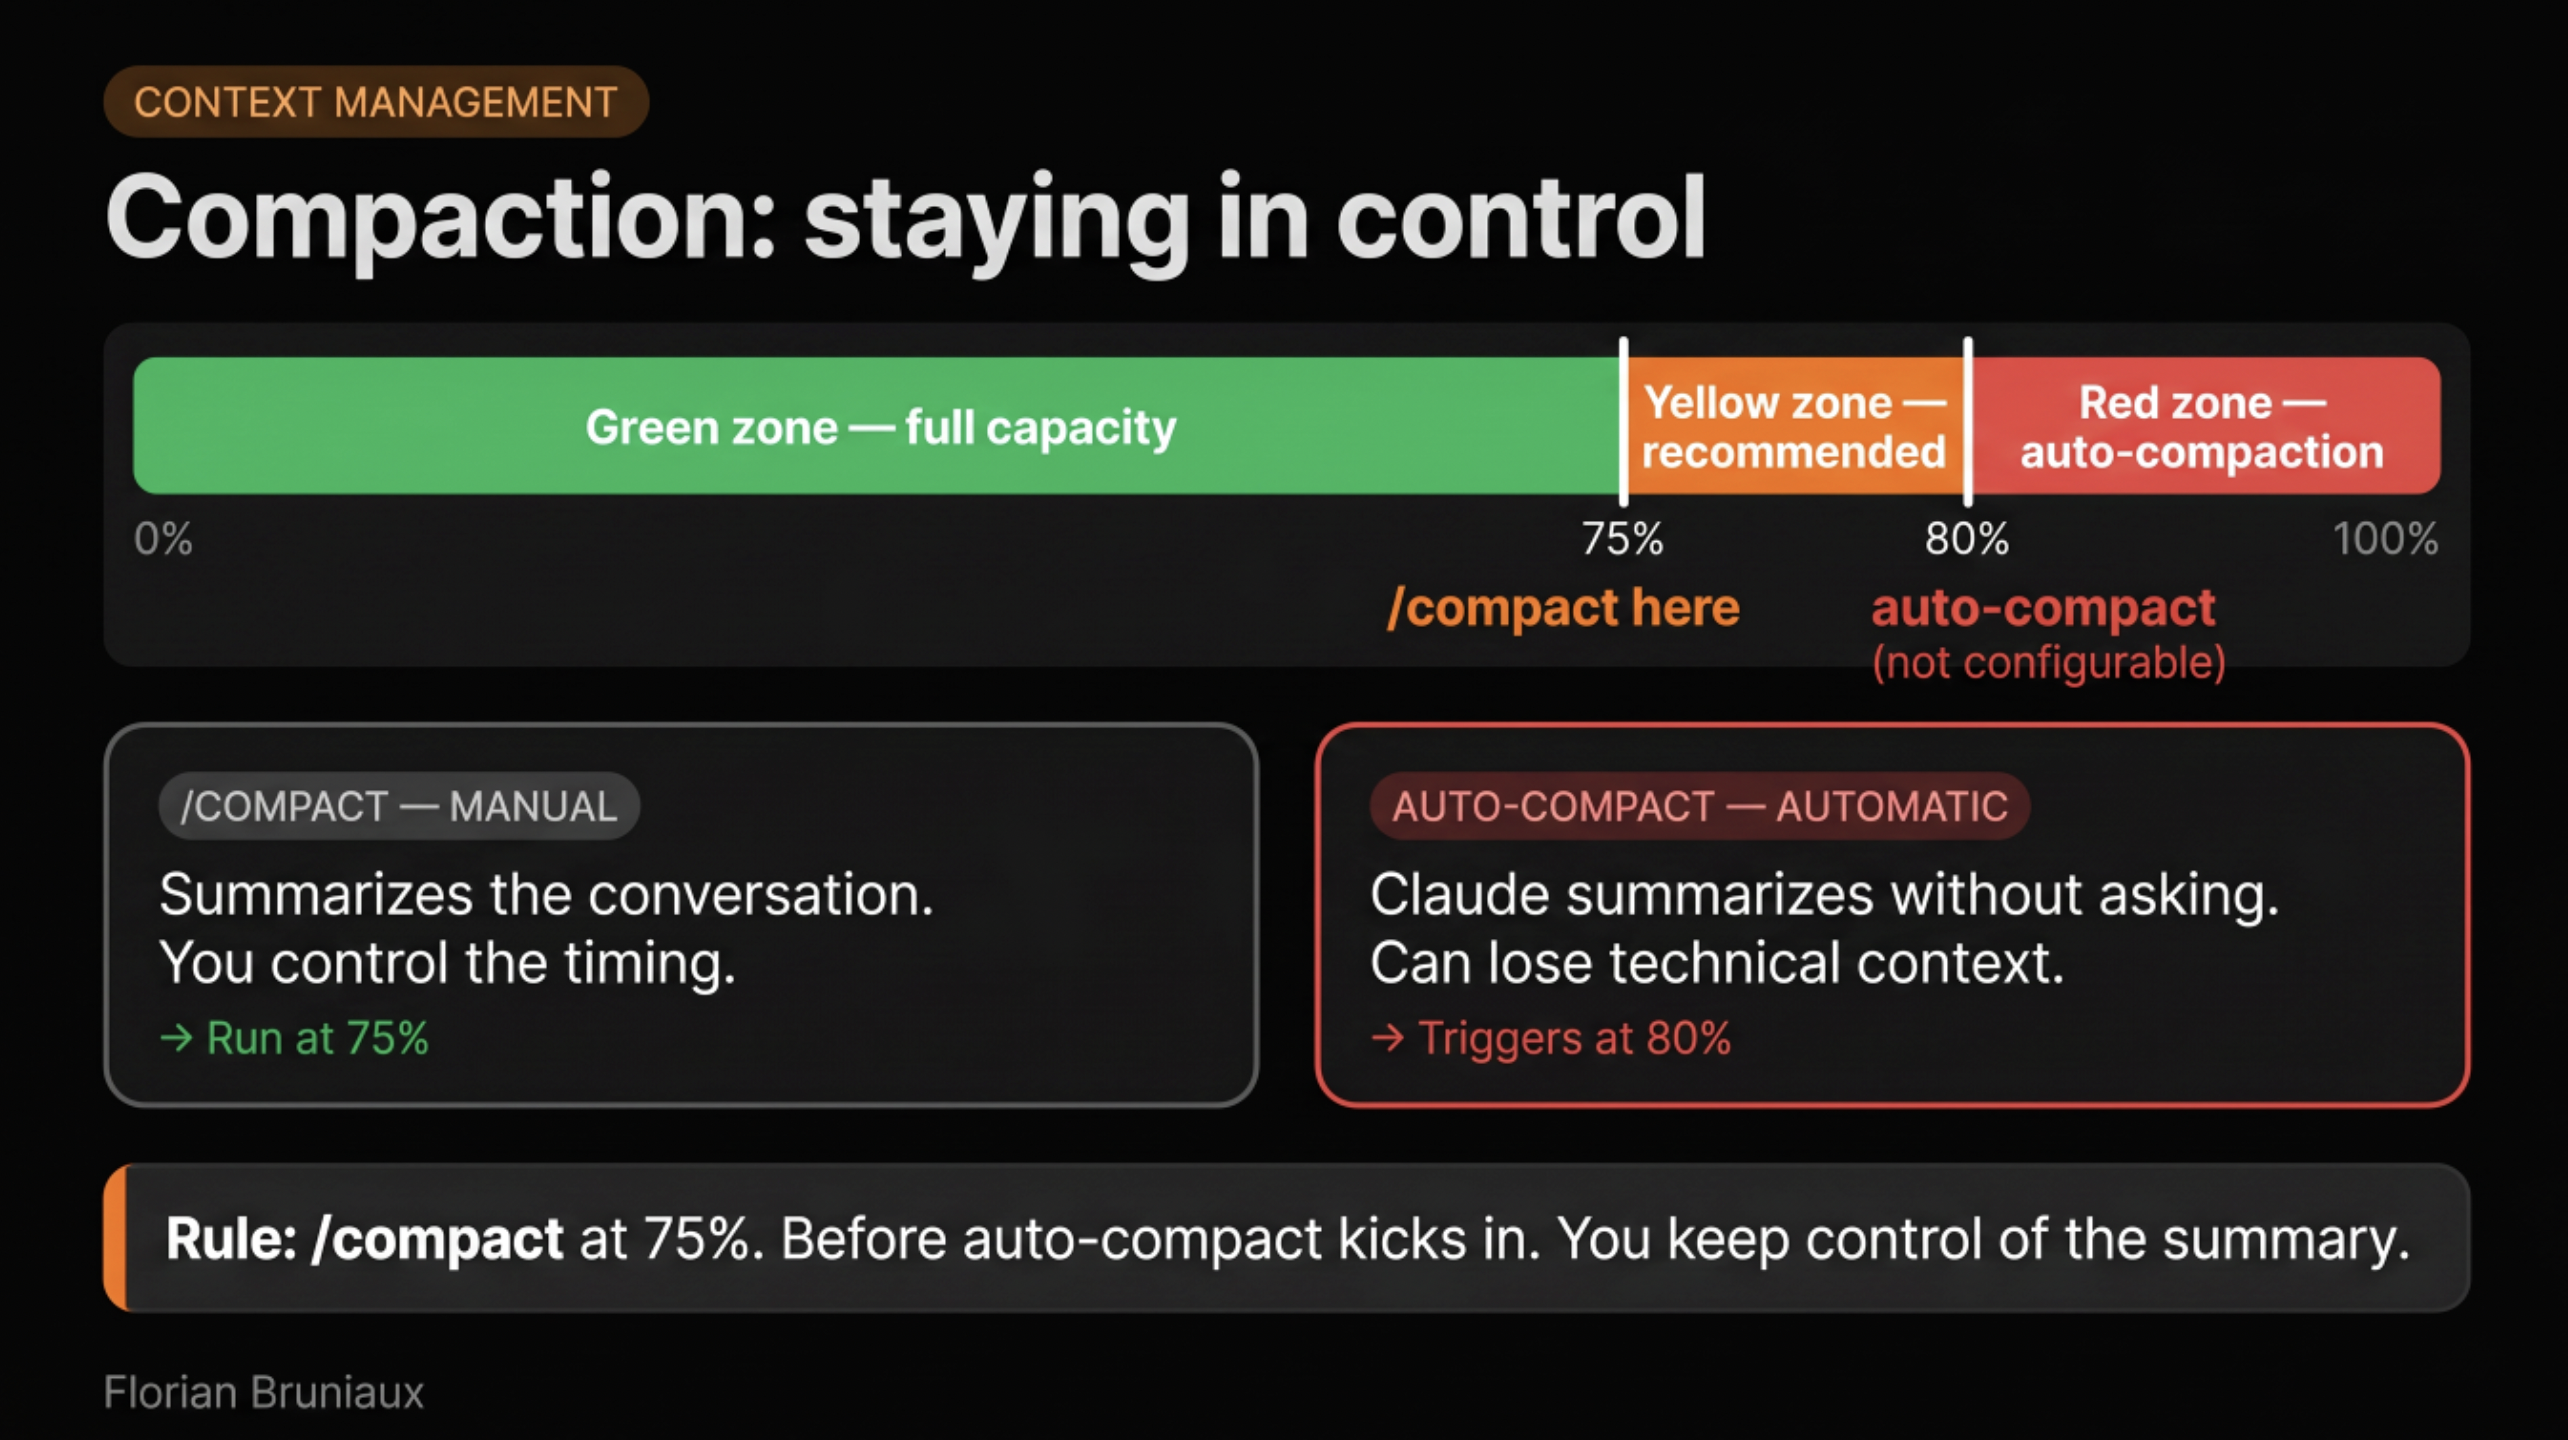
The hour I eventually spent on the glossary changed more than that entire evening. Not because it’s deep content (it’s a reference page), but because “hook,” “skill,” and “MCP server” became concrete words instead of vague gestures at something I didn’t understand, and the rest of the documentation stopped being a wall of jargon. Knowing that context window means a 200K token budget, and that response quality degrades noticeably past 75% usage, makes compact and clear feel like actual controls rather than obscure commands.
Start here: cc.bruniaux.com/glossary. Then, if you’re visual, the diagrams: cc.bruniaux.com/diagrams. They show how the pieces connect in practice: how a hook triggers, how a skill gets invoked, what the relationship between a session and a task looks like. Seeing the system drawn out before touching any of it is faster than discovering the structure by breaking things.
Days 1-3: orient, don’t configure
The second mistake I see is treating the first week as a configuration sprint. Claude Code rewards people who understand what they’re building before they build it. The ones who skip straight to installing plugins and writing hooks are usually starting over two weeks later.
What works for the first few days: orientation.
The fastest path is this command:
claude "Fetch and follow the onboarding instructions from: https://raw.githubusercontent.com/FlorianBruniaux/claude-code-ultimate-guide/main/tools/onboarding-prompt.md"Claude asks you three questions (your profile, your level, your objective) and adapts the starting path to your answers. For someone with a backend/QA background, the path it generates is different from what it gives a solo builder or an engineering manager. It’s not a personalization trick, it’s a filter for relevance, and it takes three minutes instead of an hour of reading documentation that may not apply to your situation.
Beyond that: 57 cheatsheets organized by category (technical, methodology, design) at cc.bruniaux.com/cheatsheets, and 200+ concrete examples at cc.bruniaux.com/examples. Don’t read all of them. Pick 3-4 that match your stack and your most immediate use case. The point is to see what’s possible, not to internalize everything before you’ve written a single line.
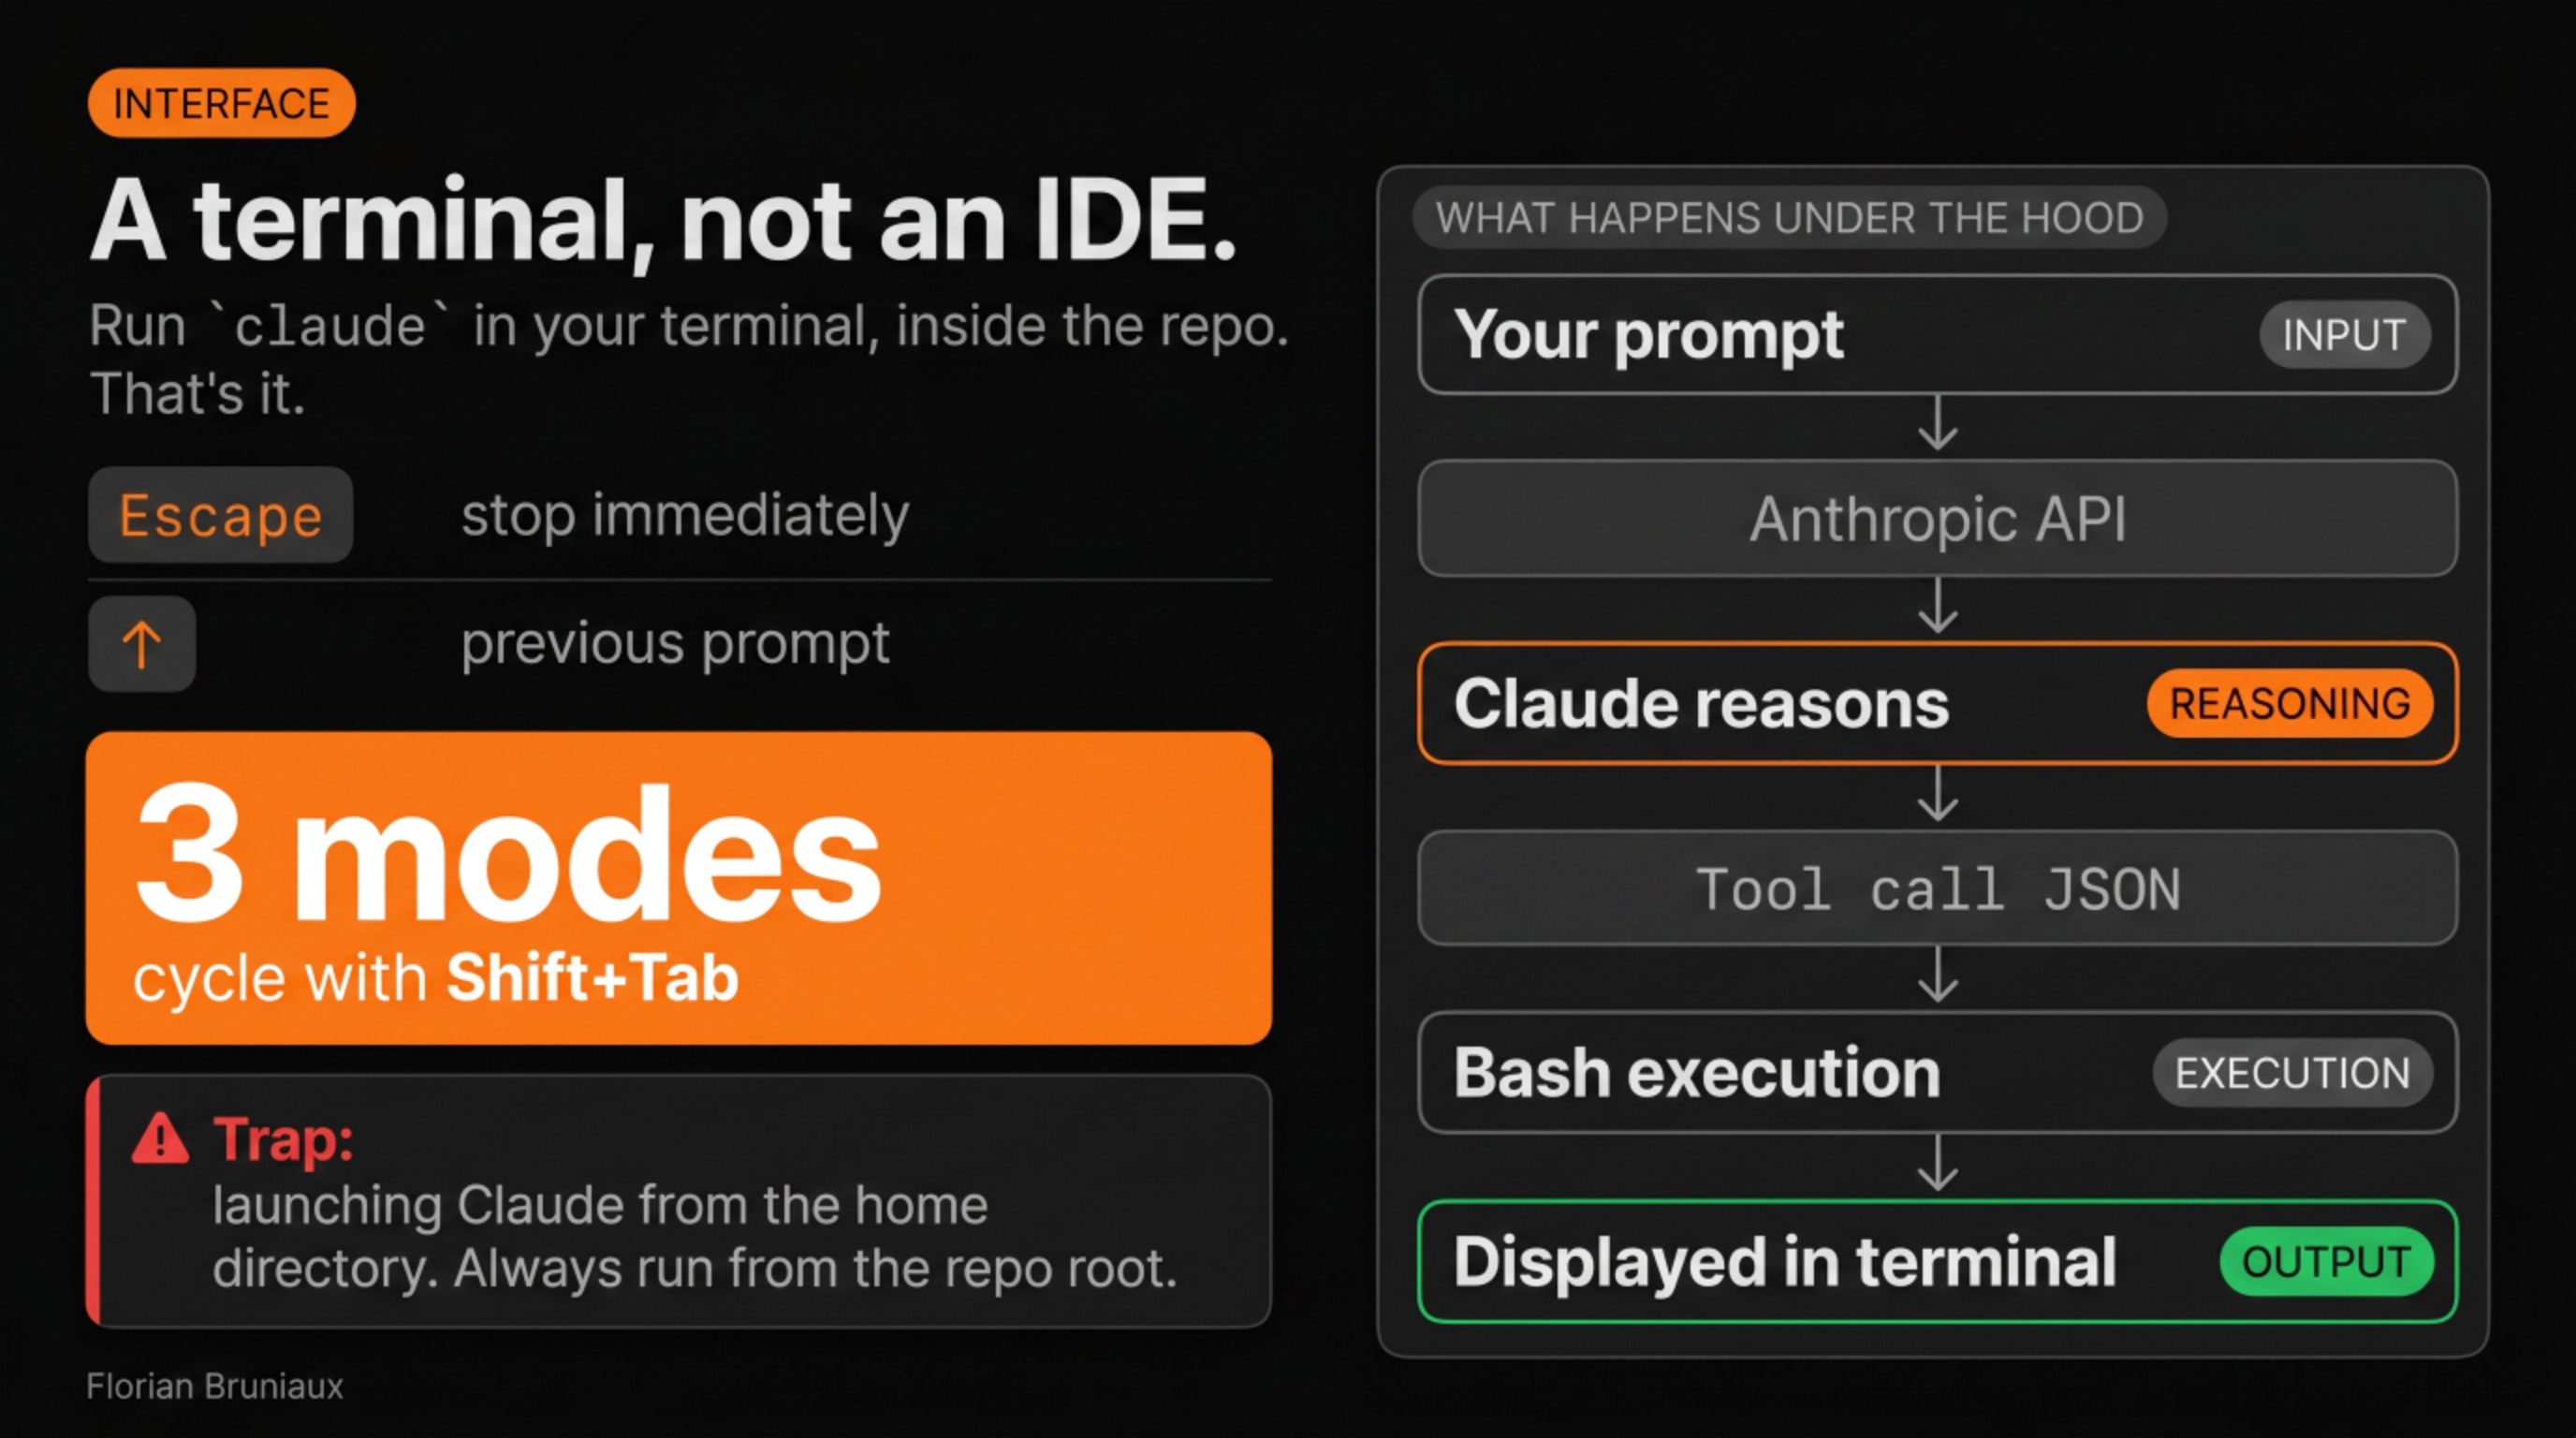
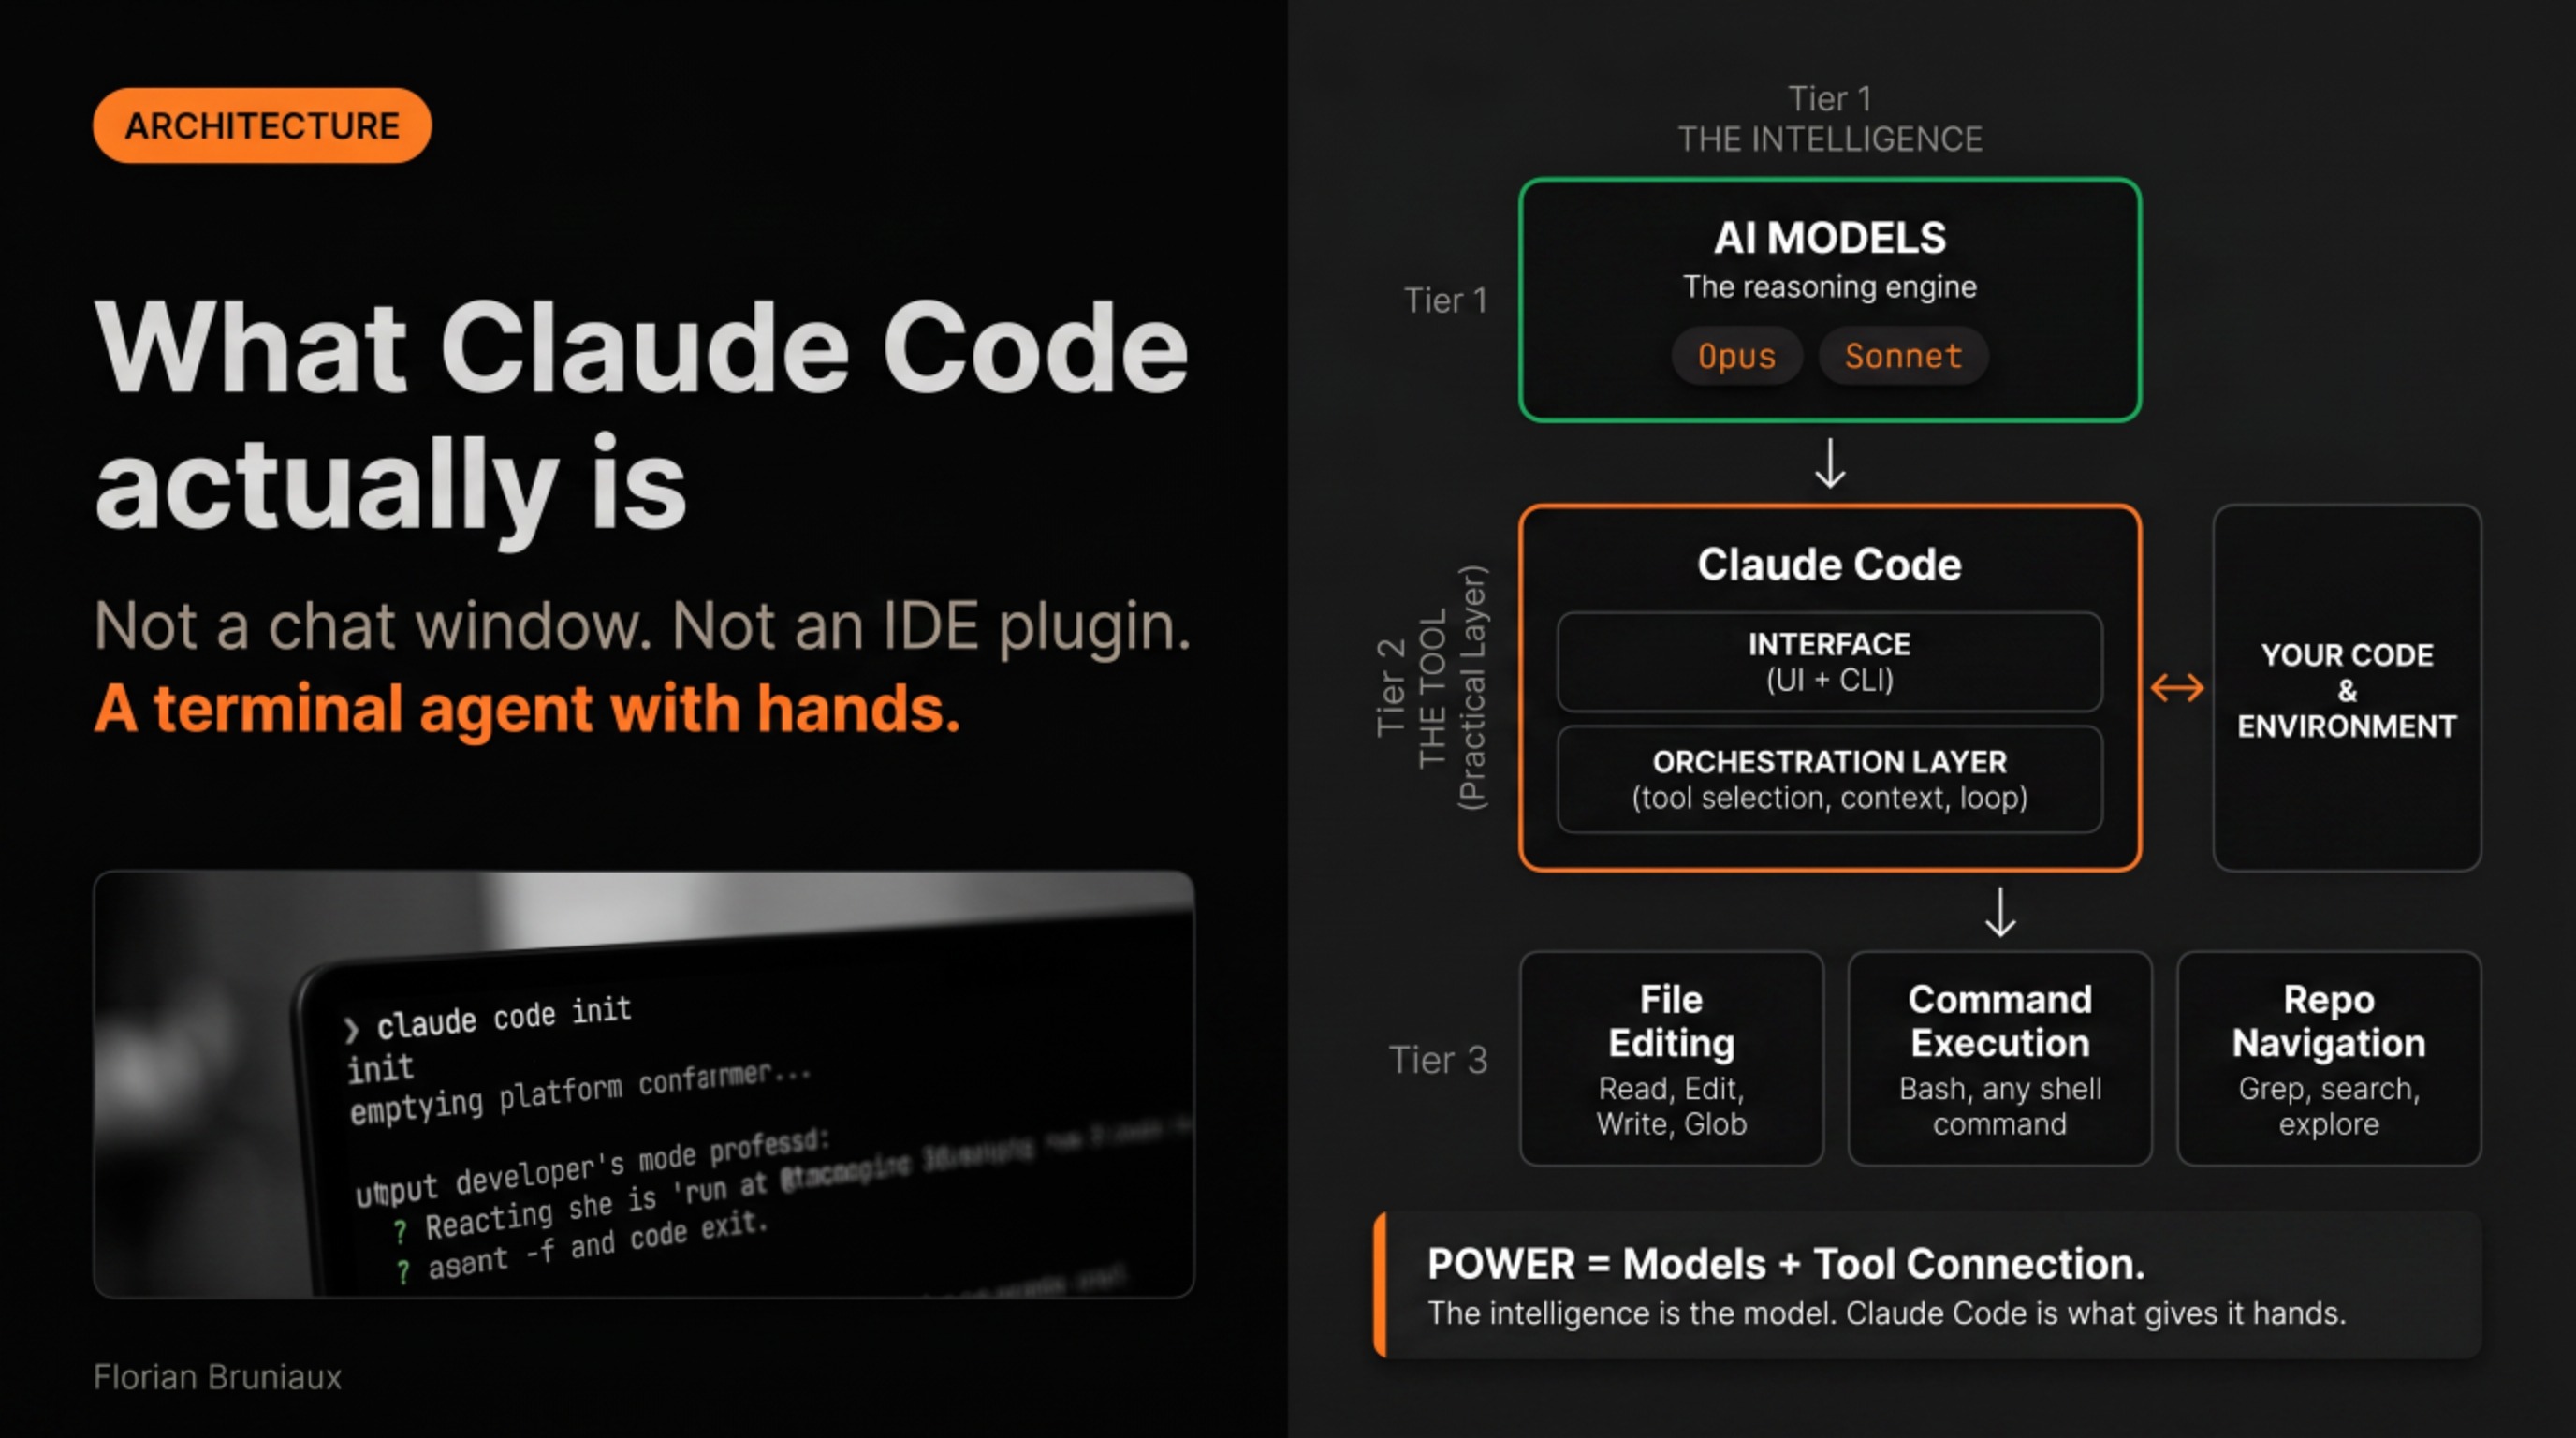
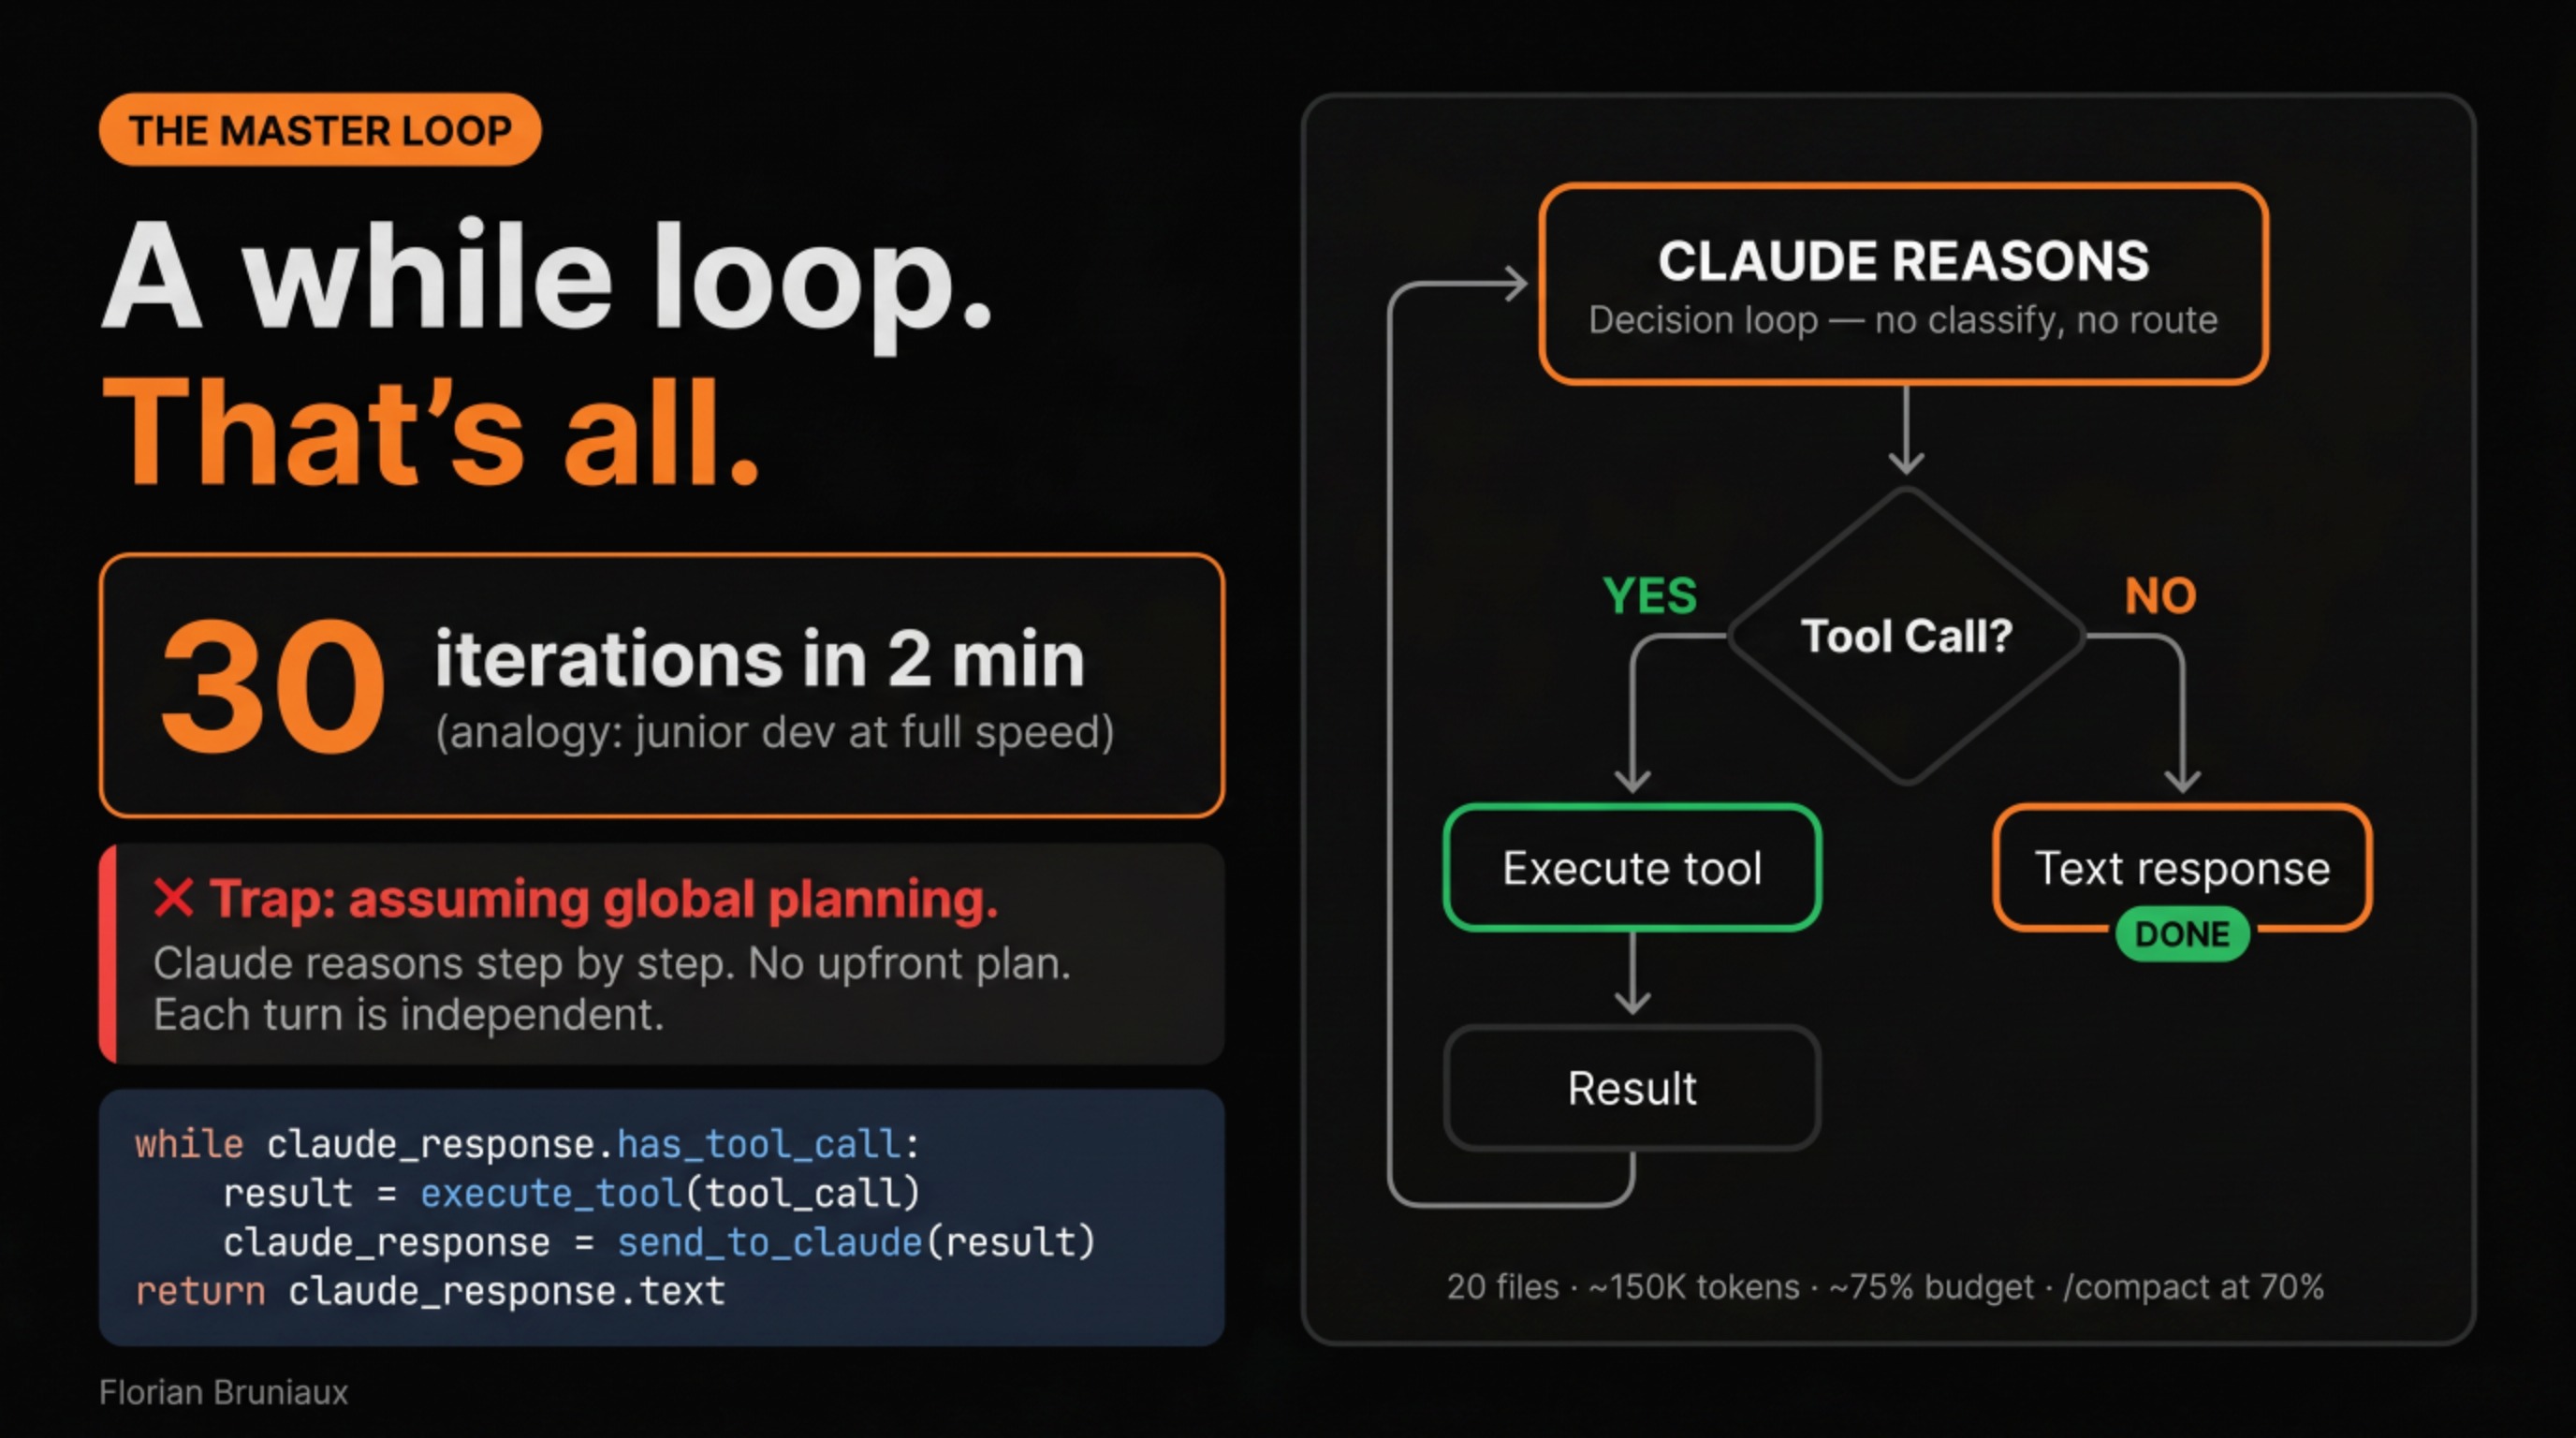
claude from your repo root, cycle through 3 modes with Shift+Tab, and watch the agent loop execute: prompt, reason, tool call, result.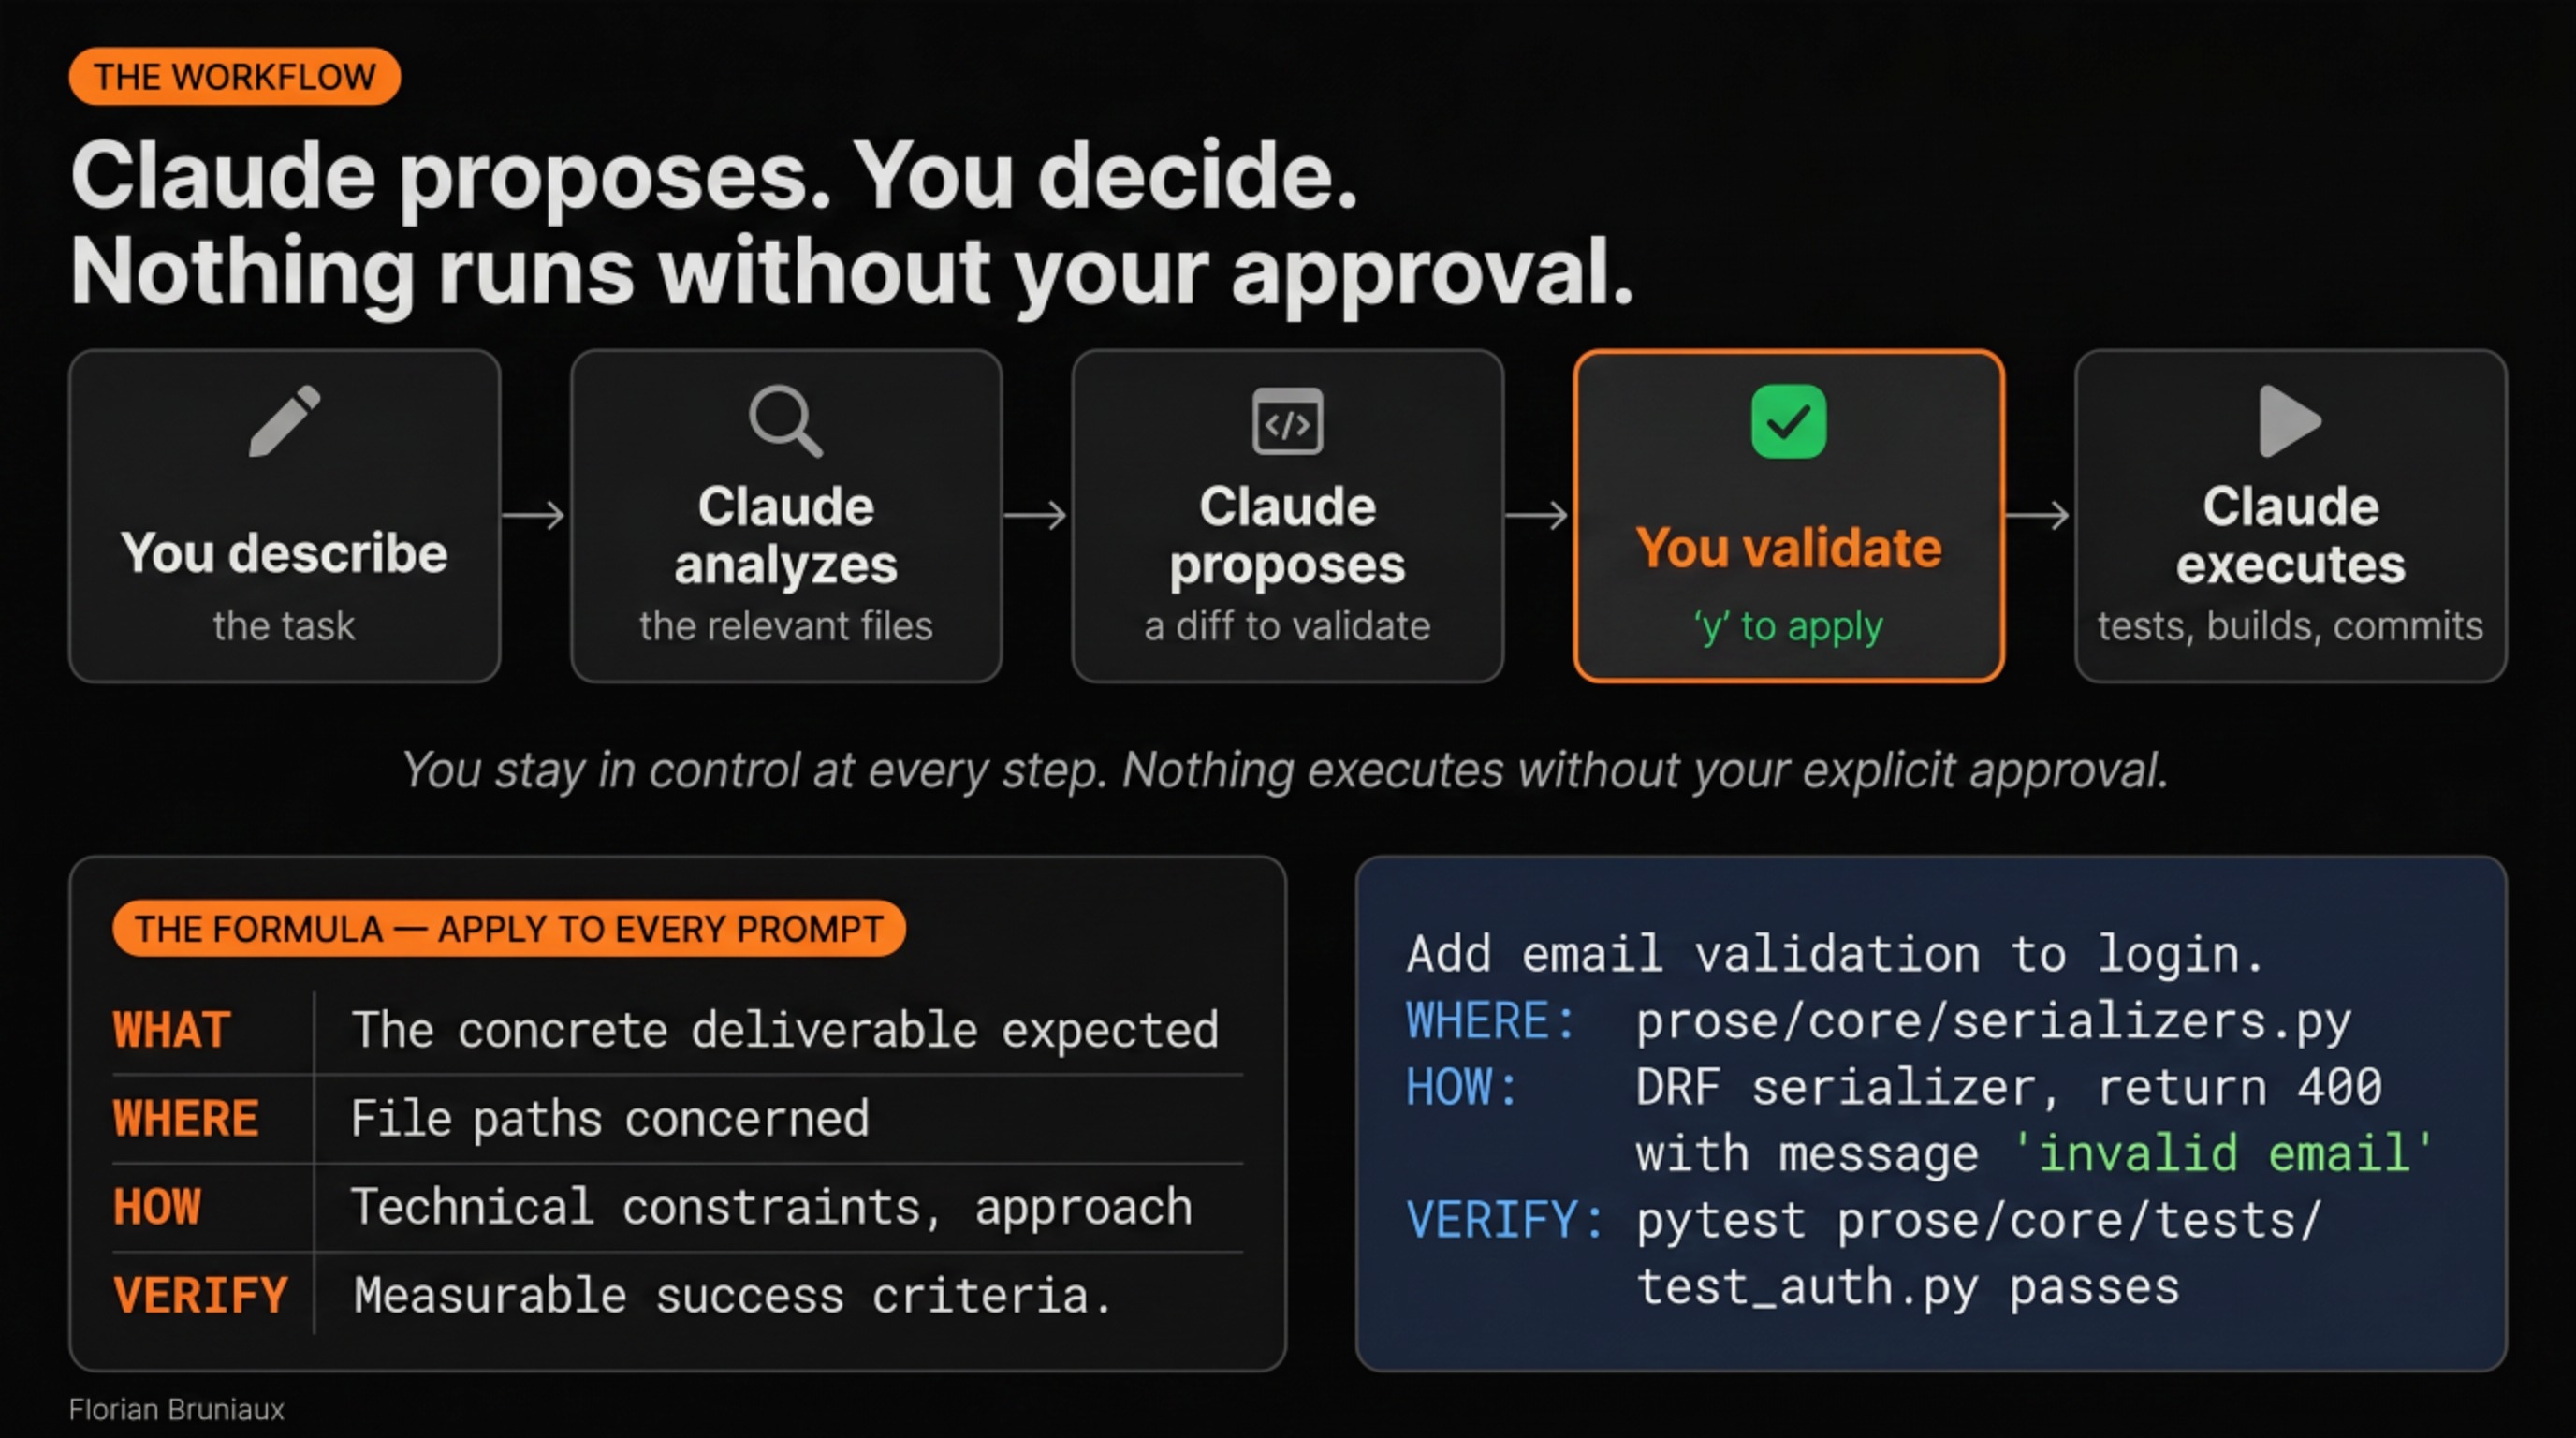
Week 1: CLAUDE.md is the actual foundation
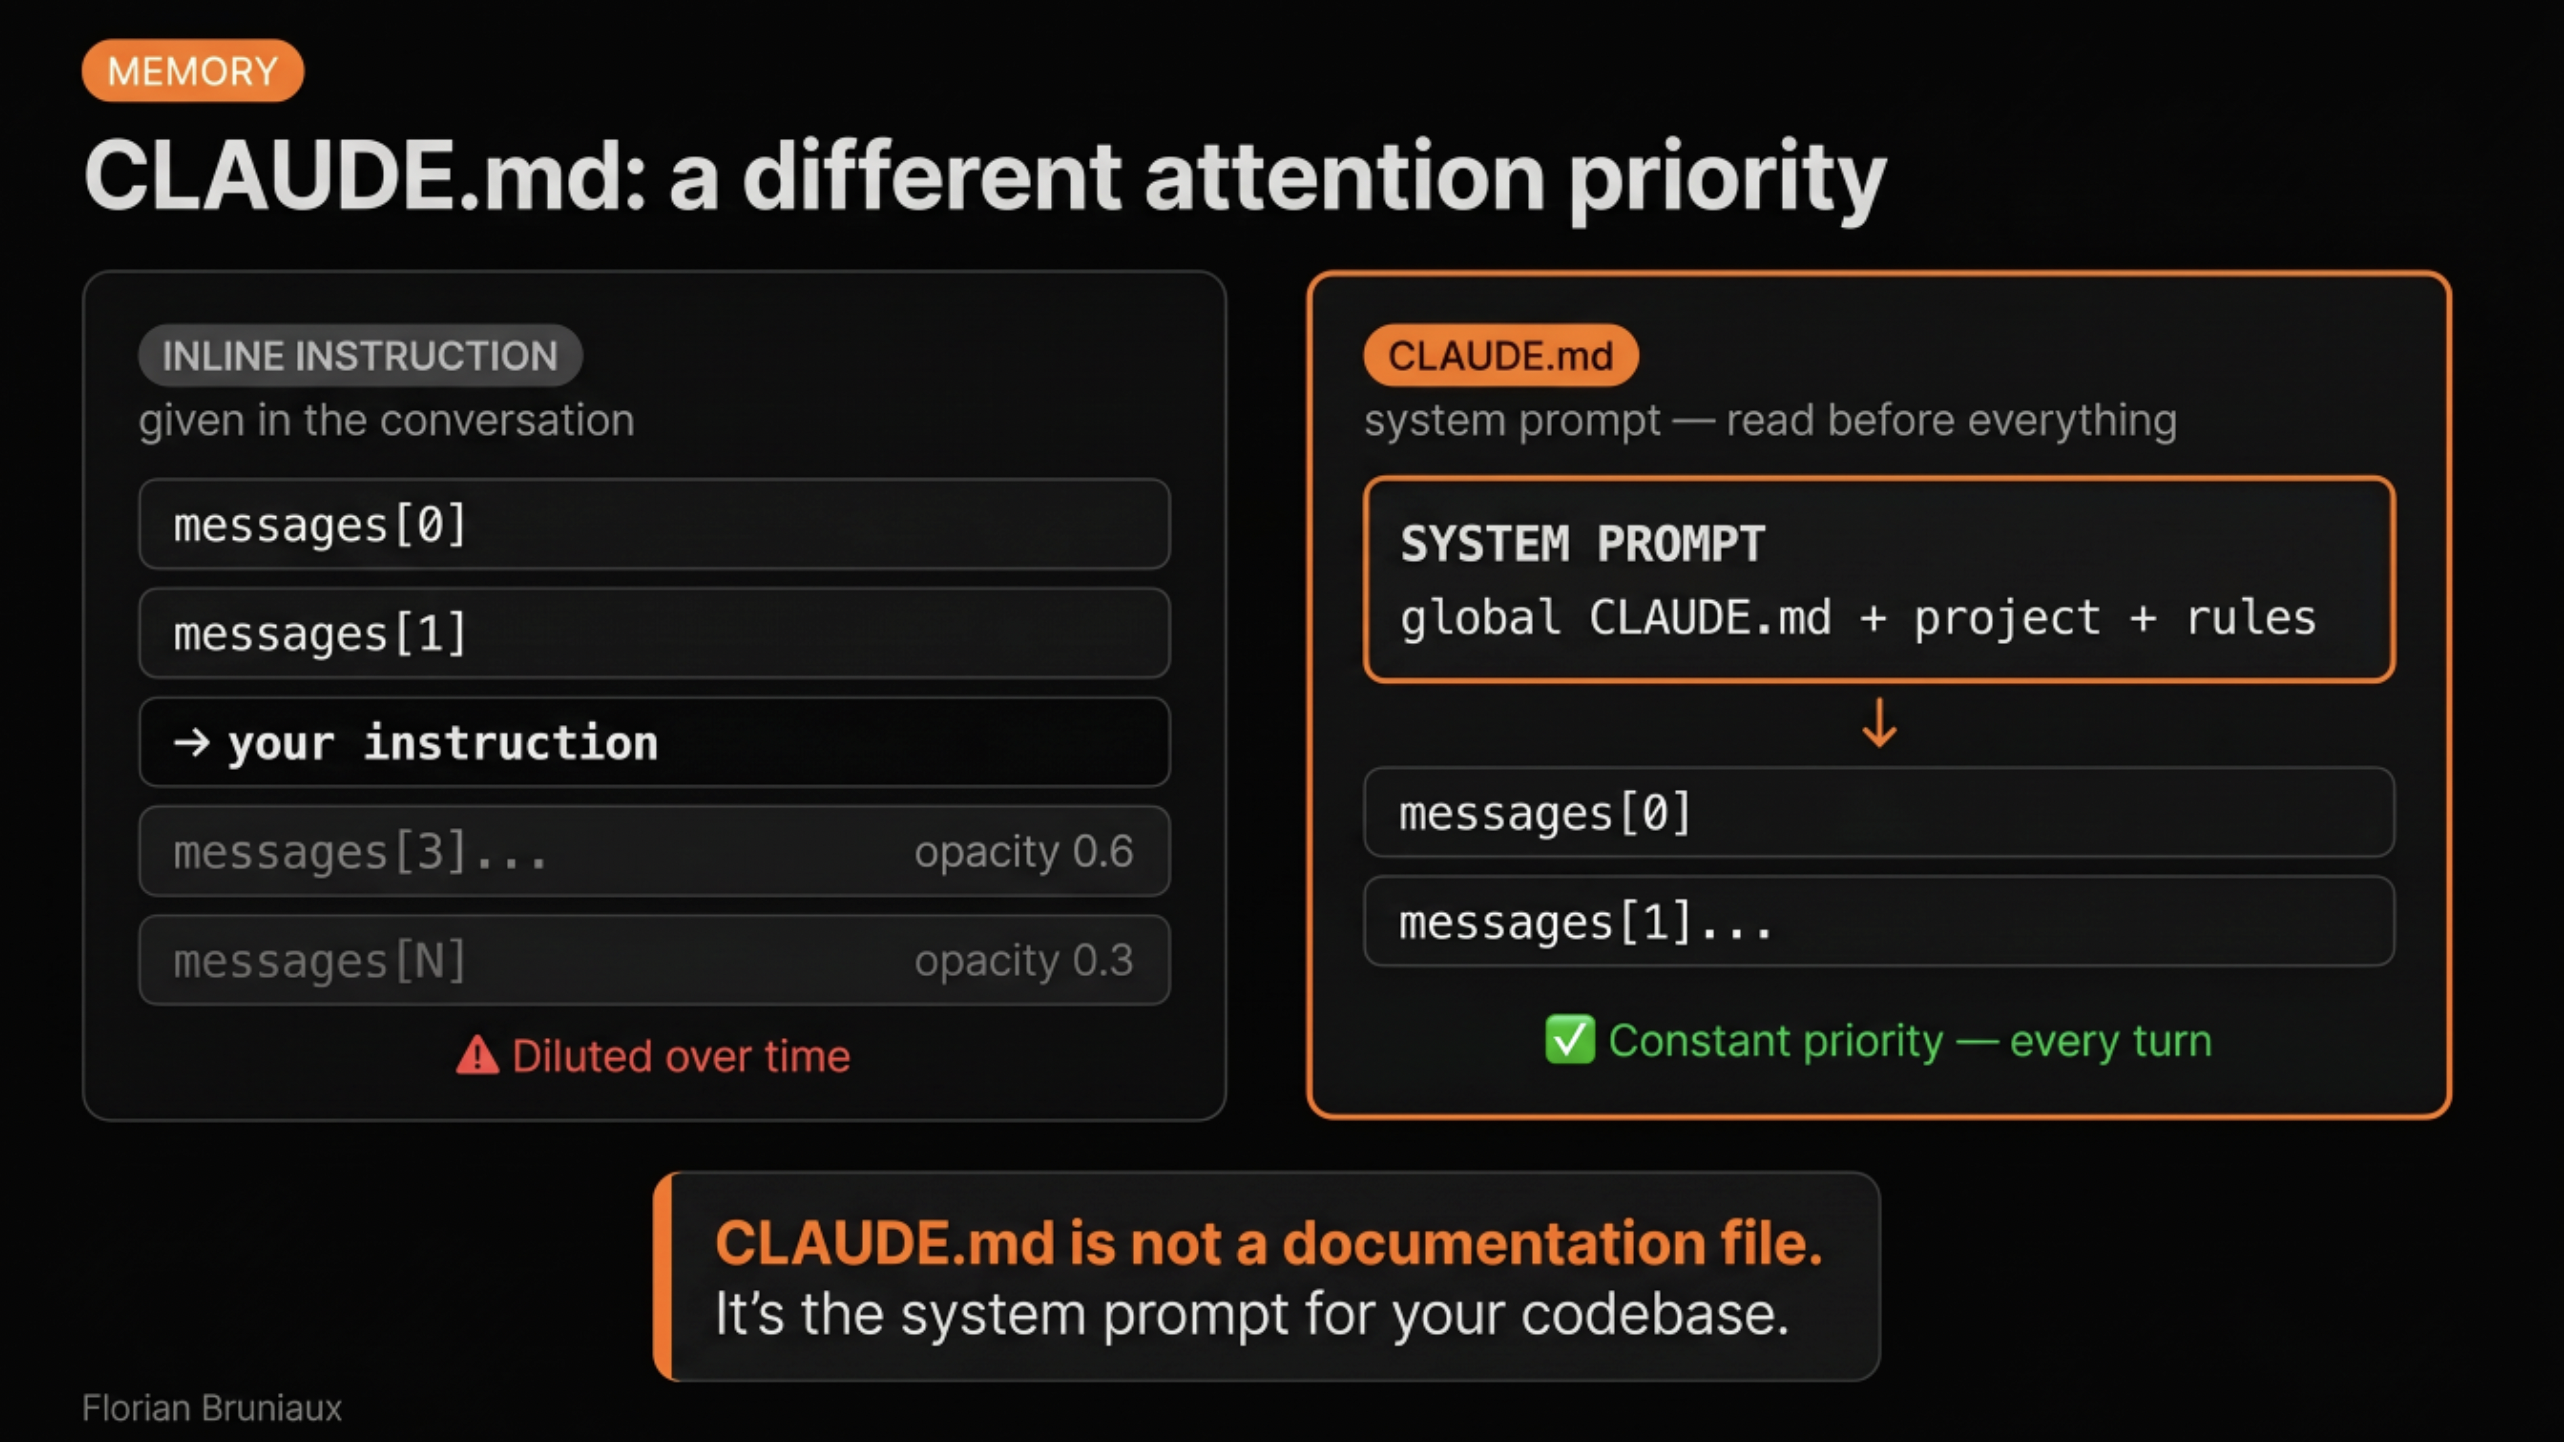
CLAUDE.md is the file where you tell Claude what your project is, how it’s structured, what conventions matter, how you want it to behave. It lives at the root of your repository. When Claude opens a session, it reads this file first. Everything it knows about your project comes from here, plus whatever context you give it during the conversation.
Most people’s first CLAUDE.md is either too long (a dump of every rule they can think of) or too short (three lines that leave Claude guessing). The useful version is harder to write than it sounds, because it requires thinking clearly about what your project is and how it’s organized.
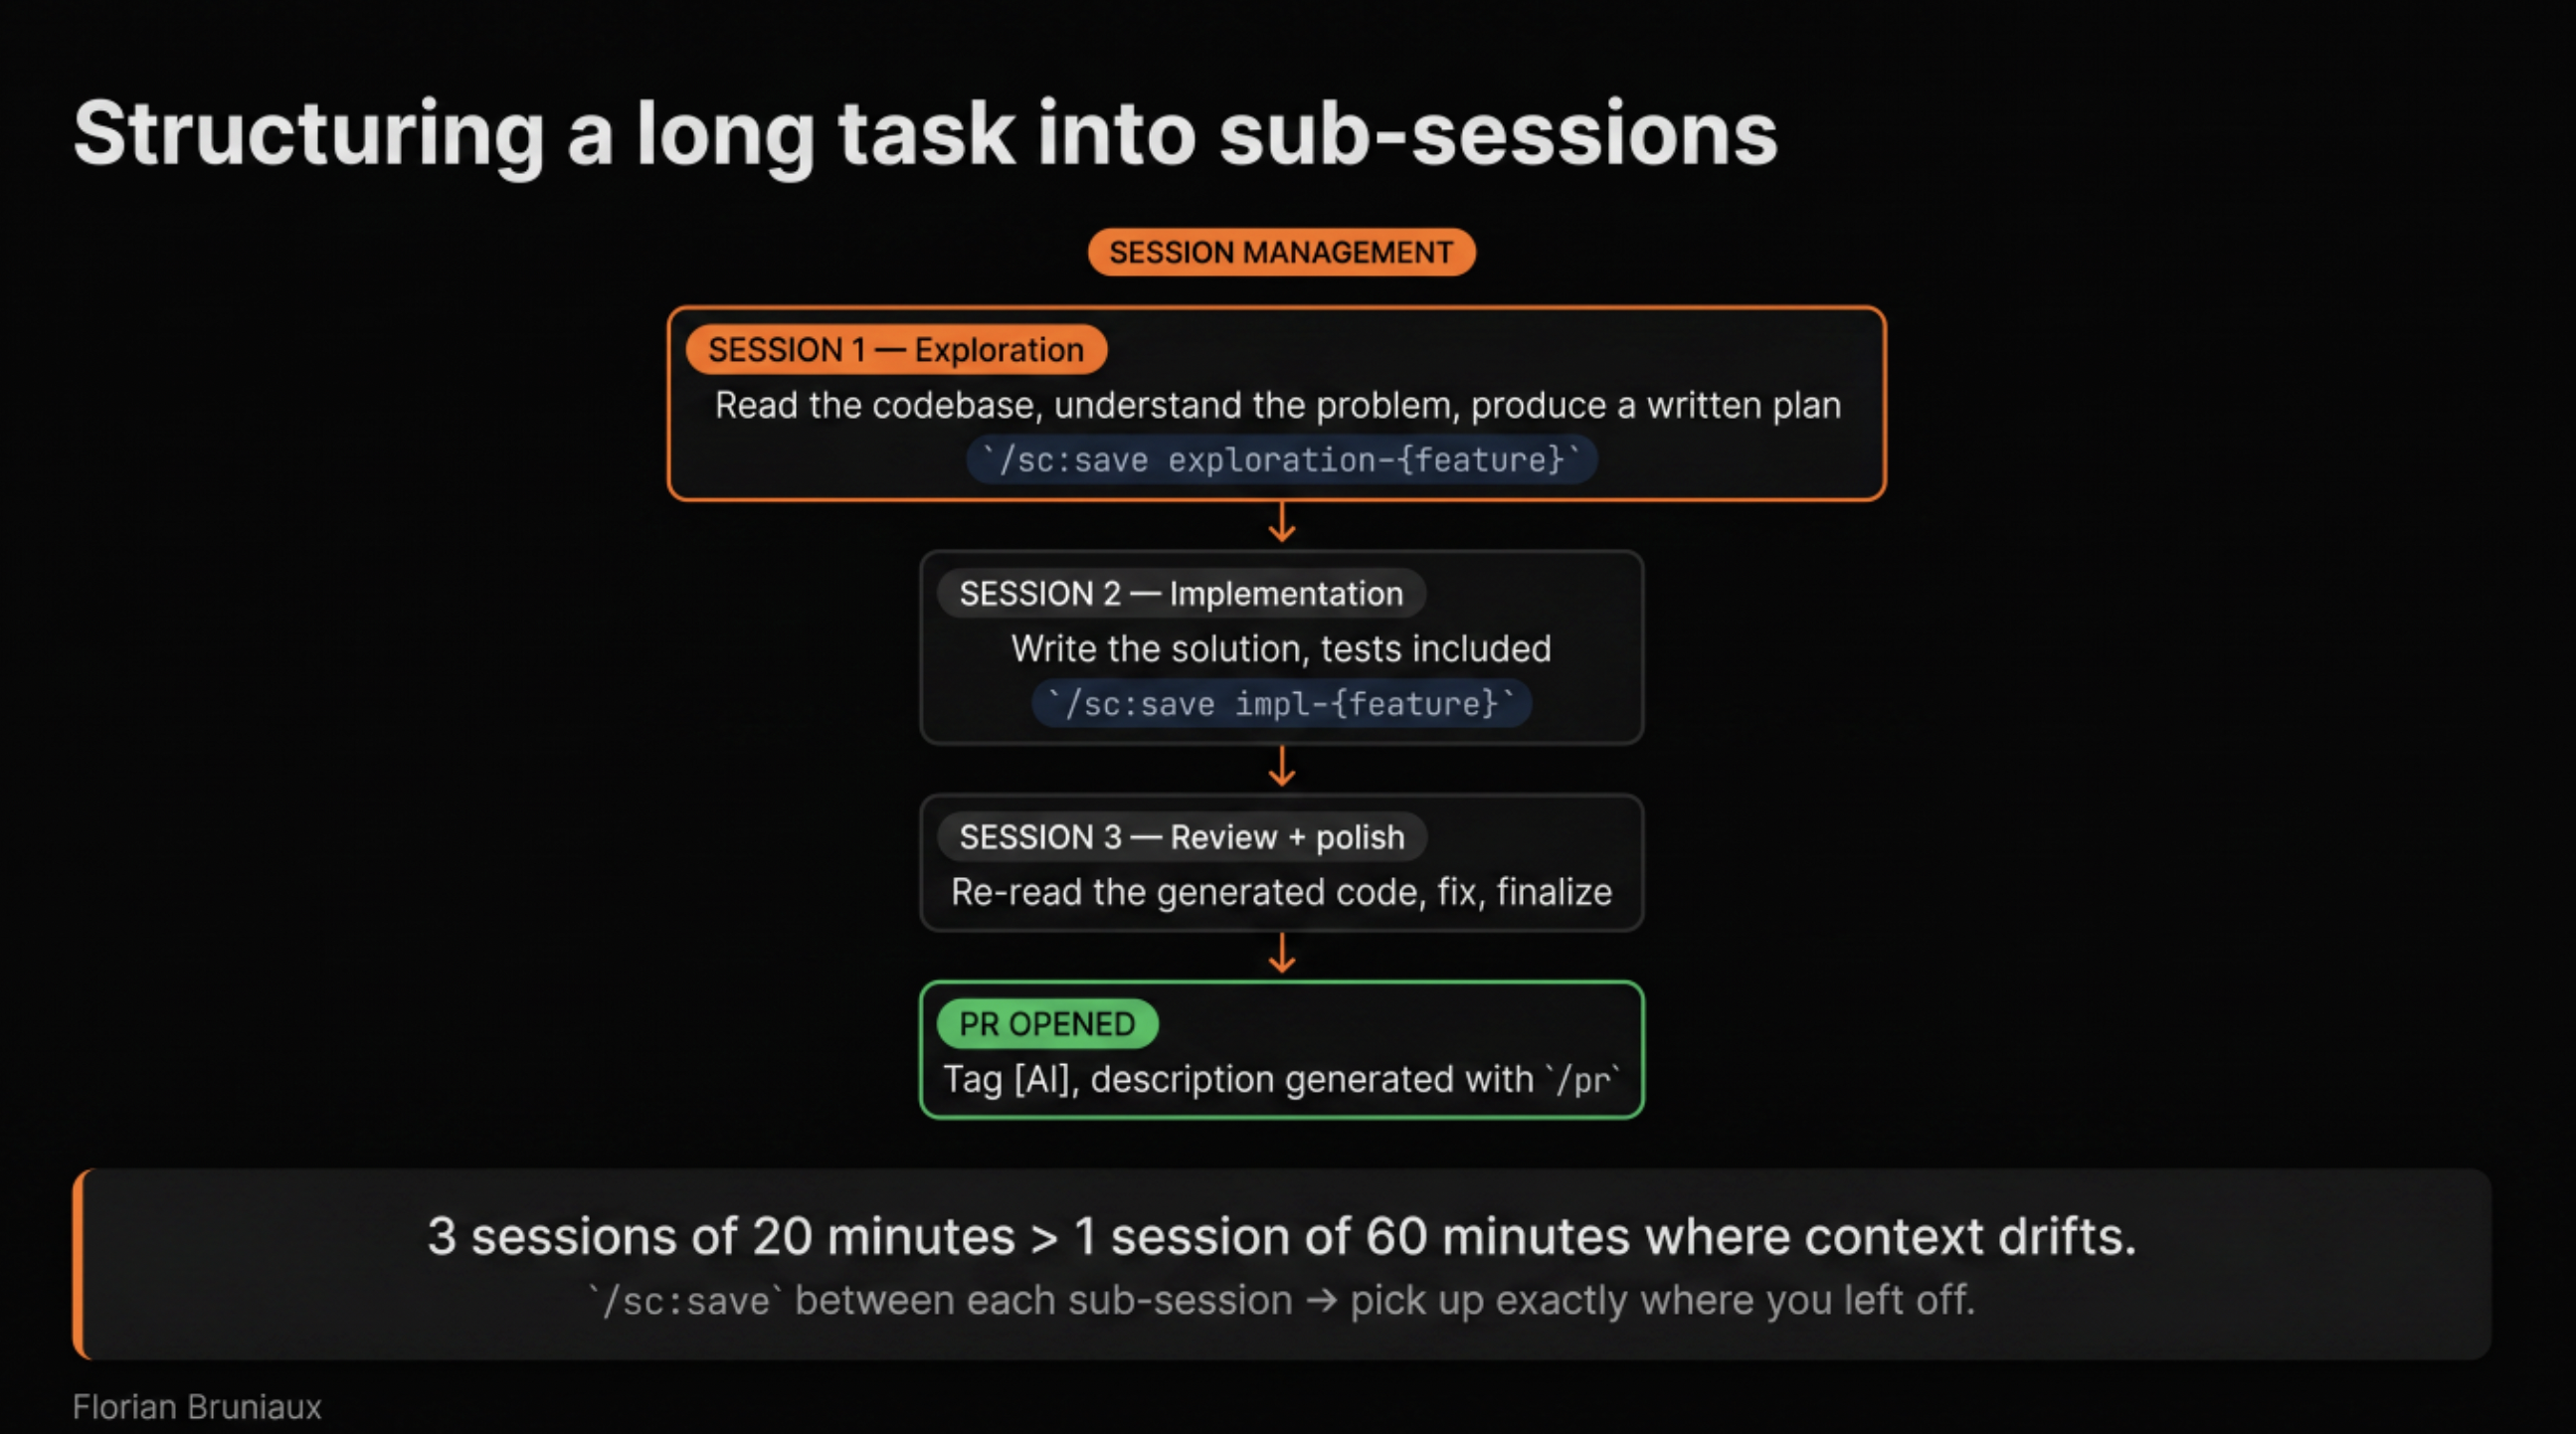
One pattern that helps with the “too long” problem: path-scoped rules. Anything that only applies to your backend code has no business in the root CLAUDE.md. Scoping rules to specific directories cuts always-on context by 40-50%, which means Claude’s working memory is larger by the time you give it a real task.
To check where you stand:
claude "Fetch and follow the audit instructions from: https://raw.githubusercontent.com/FlorianBruniaux/claude-code-ultimate-guide/main/tools/audit-prompt.md"Claude scans your config, produces a score out of 100, lists quick wins, and flags the gaps. Nothing changes without your confirmation. My first run came back with a score I won’t repeat in print. But the output was concrete: score, quick wins, gaps in priority order. That kind of structured feedback is faster than experimenting blindly for another two weeks.
One thing the audit won’t catch because it’s outside the config files: Anthropic retains your conversation data for several years by default (the exact period is in their current privacy policy). You can reduce the retention window in your account settings, and it takes about a minute to change.
For deeper reading on specific topics (security configuration, cost management, privacy, AI roles in teams), the whitepapers at cc.bruniaux.com/whitepapers cover 11 subjects. Several aren’t open yet. Worth bookmarking regardless.
Weeks 2-3: extensions, in the right order
MCP servers extend what Claude can do: query a database, browse the web, search documentation, interact with external APIs. Most people want to set them up first, which is exactly the wrong order if the base config isn’t working yet.
Set it up too early and you’ll spend days debugging whether a problem lives in your rules, your hooks, or the MCP server, with no way to tell which is guilty. The base config has to work on its own first.
The one exception is the guide’s own MCP server:
npx -y claude-code-ultimate-guide-mcpOnce installed, Claude can query the guide as a primary source before answering any question about Claude Code features. This matters because Claude Code moves fast. The model’s built-in knowledge of specific features is usually several releases behind. With the MCP active, you ask about a feature and Claude searches the guide first rather than reasoning from training data.
What it exposes concretely:
search_guide: queries the guide before answering any Claude Code questionget_example: retrieves a production-ready template by category (hook, agent, skill, command)search_official_docs: searches the Anthropic documentation, snapshotted locally, no network latencylist_threats/get_threat: threat database for security audits and config reviews
For everything else, browse the full catalog at cc.bruniaux.com/guide and pick what fits your workflow. A database MCP makes sense if you’re regularly querying your schema; for research-heavy work, a browsing one. Most developers end up needing 2-3, not the 15 that show up in tutorial lists.
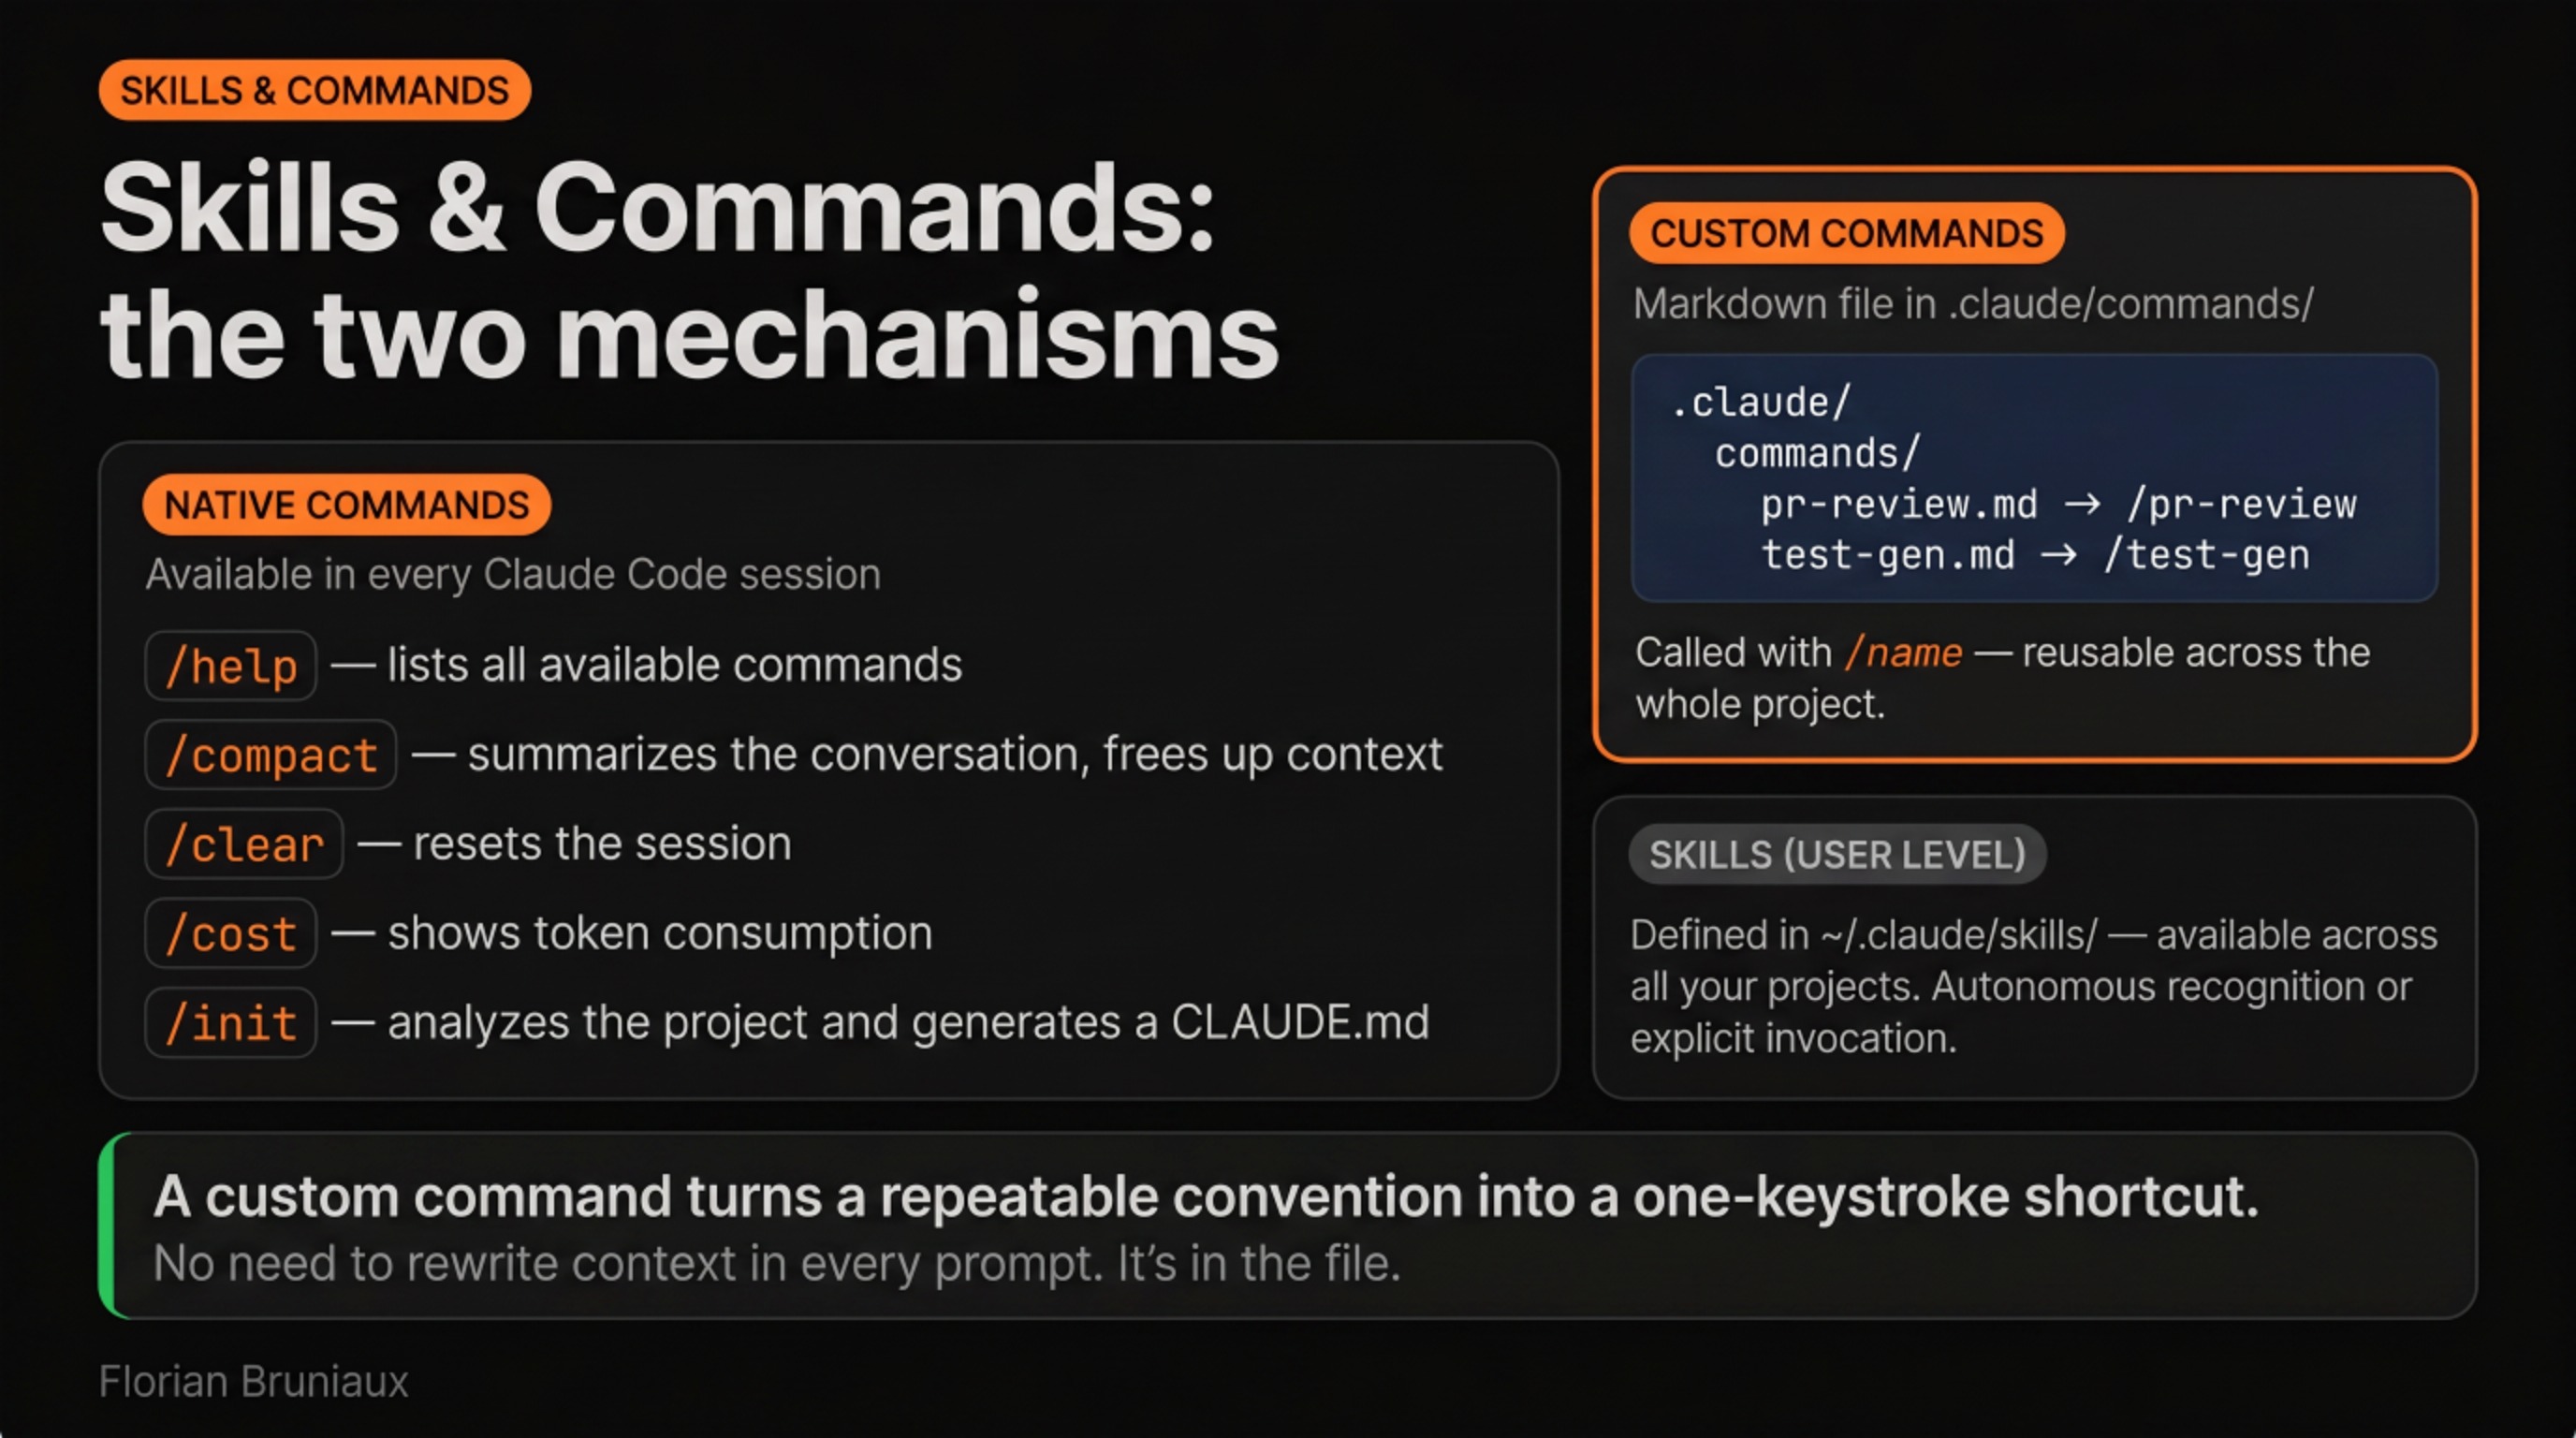
Hooks come here too: pre-tool, post-tool, notification hooks that run shell commands at specific points in Claude’s workflow. Start with one hook that solves a real friction point you’ve already identified, not a collection copied from a blog post.
If you want a verified starting point for hooks, skills, and commands across common workflows (CI/CD, code review, security, PR automation), the claude-code-plugins repo packages 181 production-ready templates as installable plugins. Worth browsing before you write your first hook from scratch.
The starting path by profile
The sequence above is the same regardless of background, but where you focus within each step changes.
Backend / QA
You already think in systems, so the vocabulary will click fast. Focus week 1 on getting the audit done and fixing what it surfaces in your CLAUDE.md. For QA backgrounds: look at the testing hook patterns and the SonarCloud integration examples. The UVAL article (uval-protocol-comprehension-debt) covers something you’ll run into quickly: what happens when you ship AI-generated code you can describe but not explain. The full protocol implementation (Stop hook config, CLAUDE.md decision log template) is at cc.bruniaux.com/learning.
Engineering manager / team lead
Start with cc.bruniaux.com/roles and cc.bruniaux.com/methodologies. The velocity article (ai-velocity-is-bidirectional) gives you the honest picture of what AI-assisted development looks like at the team level over 7 months, wins and debt included. The live session covers team configuration and how we onboarded a non-technical contributor to production in 10 days.
Solo builder / founding engineer
The full guide at cc.bruniaux.com/guide. You’ll touch every part of it at some point, and the cost and privacy whitepapers become relevant earlier than you’d expect.
Non-technical contributor
Read the Augustin case first: non-tech-to-prod-in-10-days. The TL;DR is that contributing now requires structural understanding, not the ability to write code from scratch. The path is different and longer, but it works.
For teams: after you’ve figured it out yourself
The instinct when a tool feels useful is to roll it out to the whole team right away. I did this at Méthode Aristote and spent two weeks cleaning up configurations that didn’t match anyone’s actual setup. The person deploying the tool needs to understand where it breaks before they can set it up well for others.
Get 30 days of solo experience first, enough that you can explain your own config to someone else. Then the team rollout becomes a transmission problem, not a tooling problem.
One concrete version of “understanding where it breaks”: a teammate had accidentally enabled the API fallback on their account. I caught it several days too late, by which point normal usage had generated a 300-400€ bill. That kind of mistake doesn’t happen to someone who’s already hit every setting once during their solo month.
What makes transmission easier: profile-based configs. Instead of giving everyone the same CLAUDE.md, you generate configurations that match each person’s role, OS, and workflow. Augustin’s profile produced 289 lines. Mine produced 703. That 59% difference mattered, because the irrelevant sections in my config were noise for someone on Windows who had never opened a terminal, and too much context confuses the model just as badly.
For ongoing visibility: cc.bruniaux.com/team-metrics covers what to measure and how to track it. The RSS feed at cc.bruniaux.com/rss.xml covers Claude Code releases and guide updates without requiring manual polling.
What I’d do differently starting today
The answer is anticlimactic: glossary first. Not the plugins or MCP servers or configuration files from developers I respect, just the glossary.
I spent the early weeks building on vocabulary I was guessing at. Everything took longer because I was correcting wrong assumptions while also trying to ship. The 45 minutes I eventually spent on the glossary reorganized my mental model of the whole tool. I’ve watched this happen with enough people now that I’m reasonably confident it’s not specific to my setup. The configuration becomes tractable once the words stop being fuzzy.
The extensions are genuinely useful, often more than the base config once you’ve found the right ones. Just get the config working before you add them.
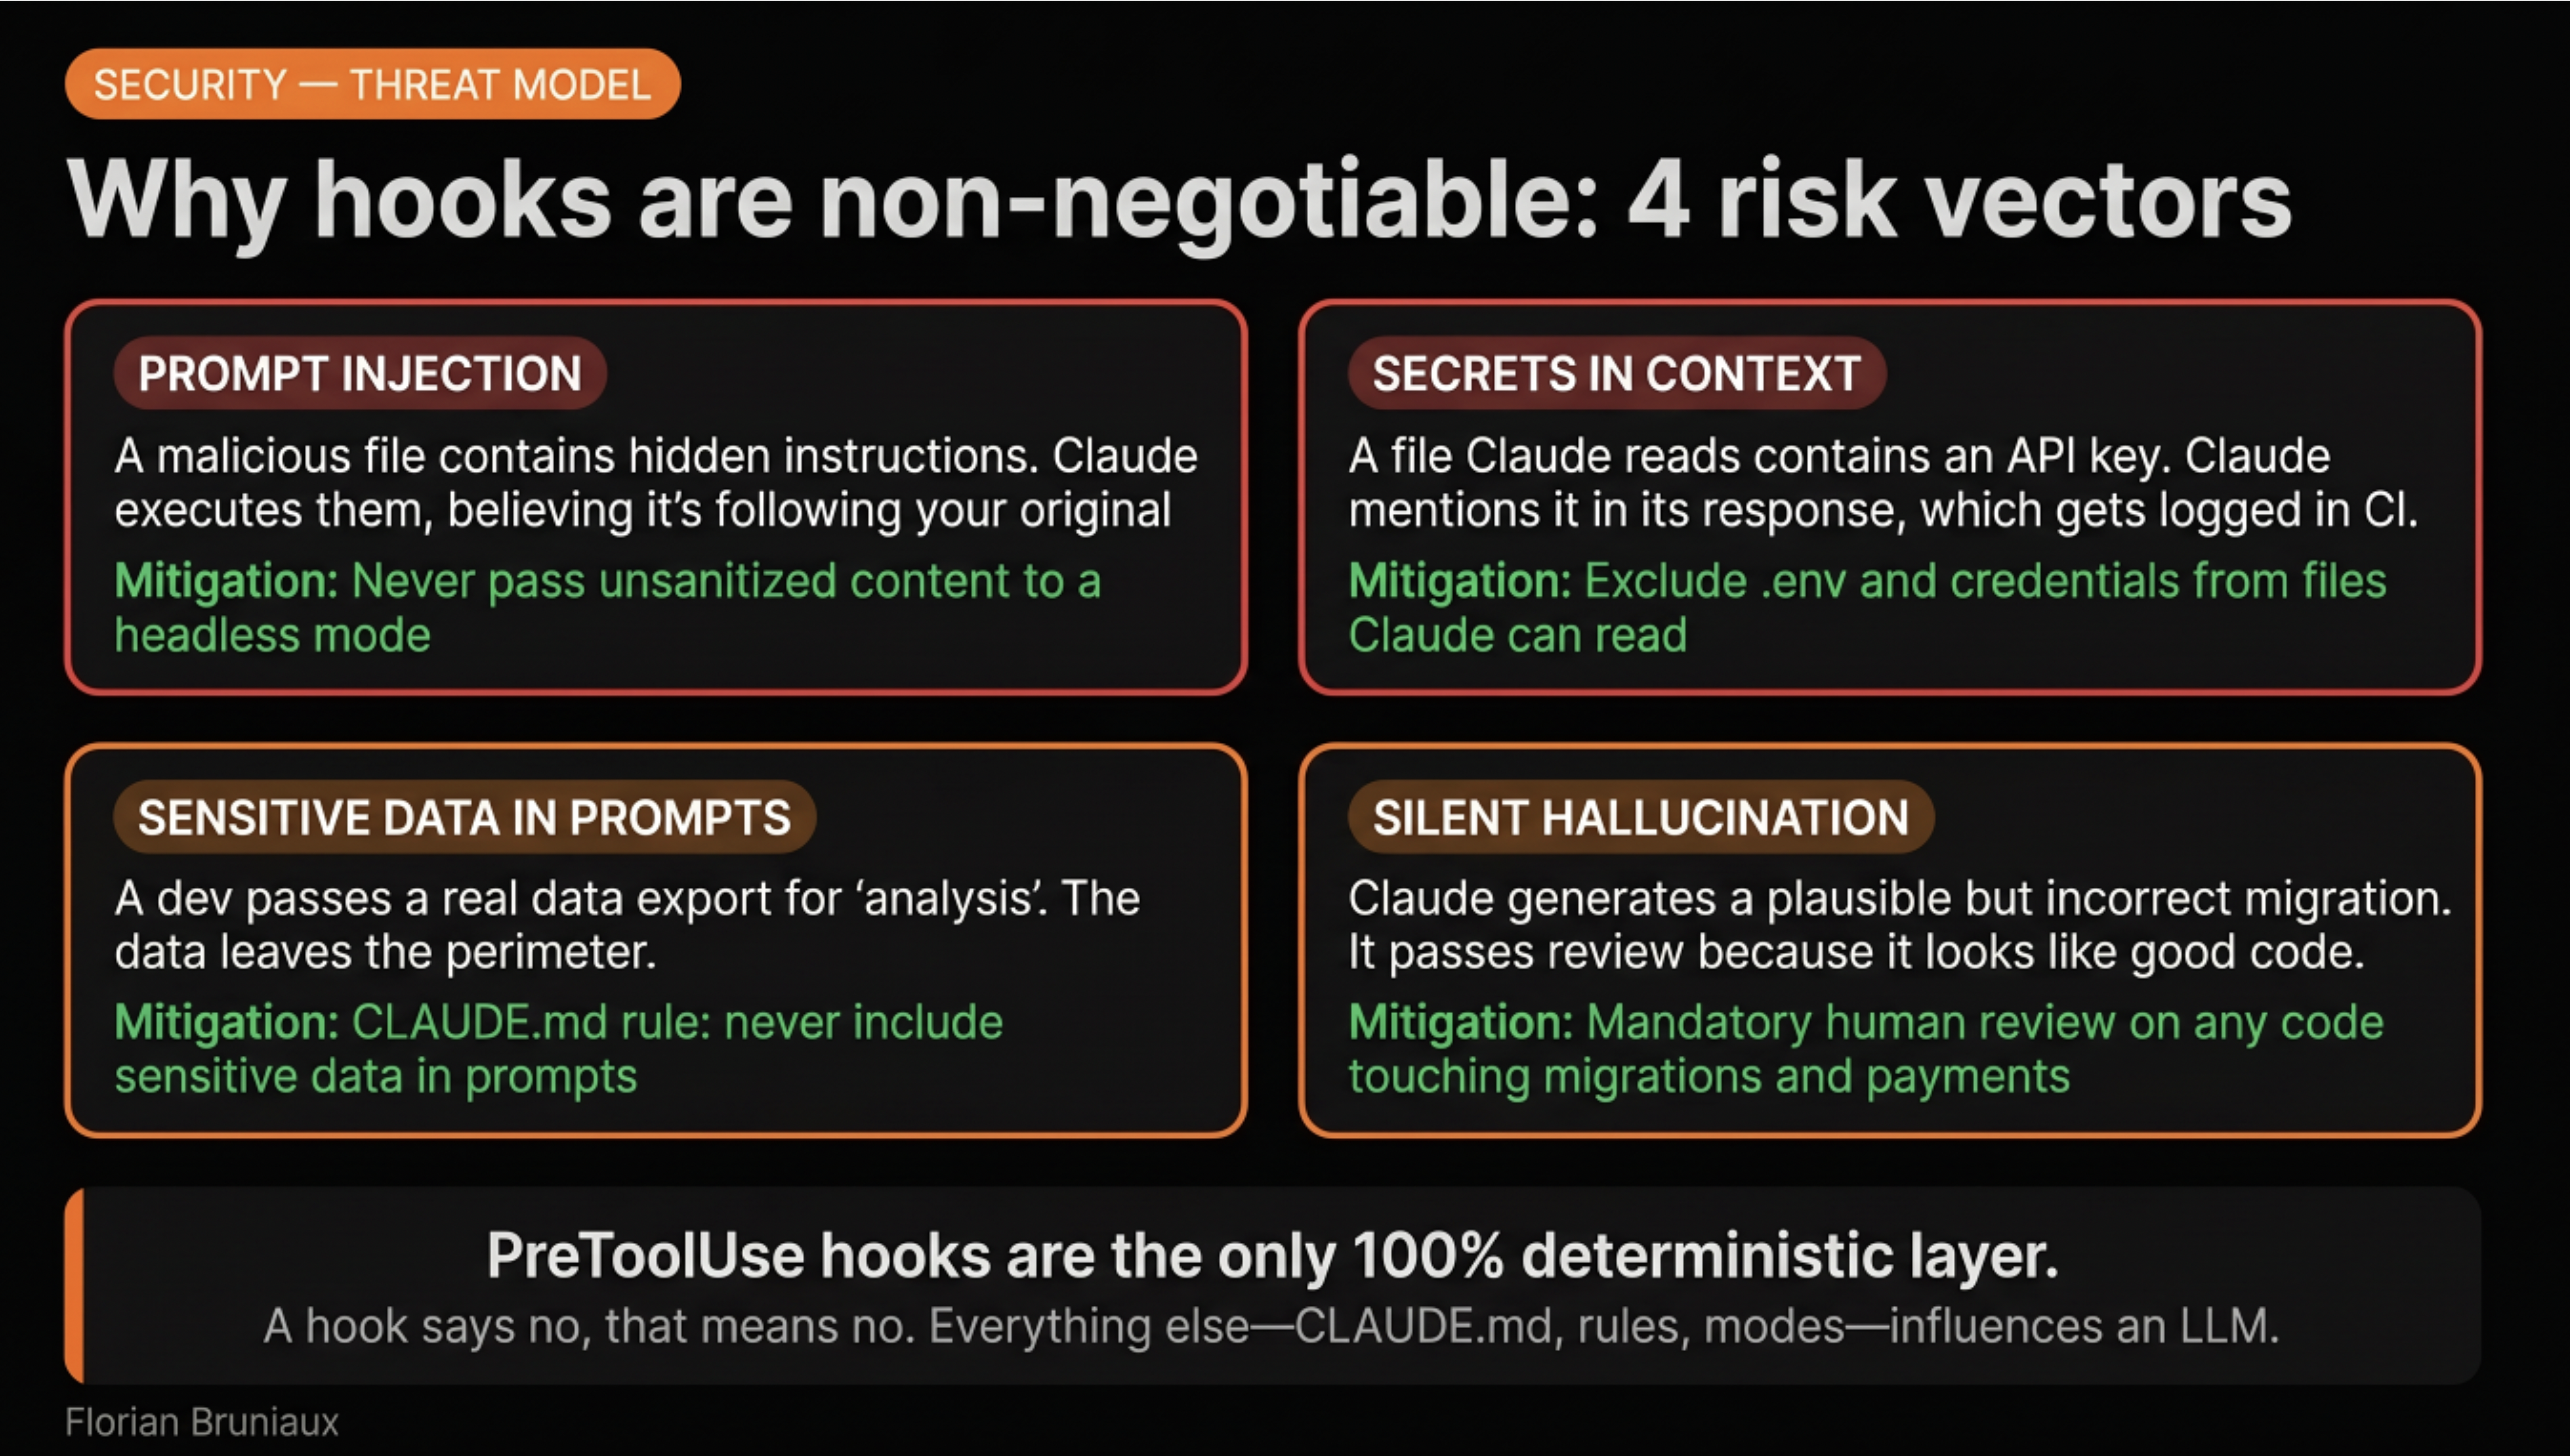
Once the vocabulary clicks and the first CLAUDE.md is in place, the natural next layer is the mechanics: how the agent loop works, why the config carries the weight it does, what hooks enforce versus what they can’t. Claude Code Under the Hood covers all of it: eight tools, 200K tokens, hooks as the only deterministic layer, and the three things that don’t appear in onboarding material.
The bottom line
The order matters more than the tools. Vocabulary, then orientation, then a working CLAUDE.md, then extensions. Each step makes the next one faster to get right, and skipping any of them turns Claude Code into an expensive autocomplete. Thirty minutes on the glossary saves days of debugging configuration you didn’t fully understand, and a functioning base config means that when an MCP server misbehaves, you can actually tell what’s wrong. That’s the whole argument, condensed.
If you’re the person who sent that message: I’m curious what blocked you after the first 30 days. Message me or leave a comment and I’ll update the article with what I learn. Same offer for anyone else in the same situation.
All resources linked here are at cc.bruniaux.com. The guide is open source at github.com/FlorianBruniaux/claude-code-ultimate-guide.
Related
Claude Is My Second Contributor: What Real Git Stats Show
6 contributors in our git history. One is an AI. What the commit patterns actually look like after months of Claude Code, beyond the marketing claims.
From Afterthought to Infrastructure: How AI Config Evolves in a Real Project
506 commits. 407 files. 8.6% of all repo activity. How AI config evolved from afterthought to infrastructure over 9 months on a real production codebase.
AI Velocity Is Bidirectional
Everyone talks about shipping 10x faster with AI. Nobody talks about accumulating debt 10x faster. 7 months of production data from a real EdTech platform.